
Bay window installation is one of the most transformative home improvement projects a homeowner can take on, adding natural light, extra interior space, and significant curb appeal in a single upgrade, but it is also one of the most technically demanding window projects because bay windows project outward from the wall and require careful attention to structural support, weatherproofing, and energy efficiency. Unlike a standard flat window replacement (where a new unit fits into the existing rough opening), a bay window creates a small projecting structure that must be properly framed, supported, insulated, flashed, and roofed to prevent water infiltration, sagging, and drafts. The upfront planning matters more here than with almost any other window type, and getting the details right at the start prevents years of maintenance headaches later. Homeowners in Dayton and surrounding areas who understand these key considerations before starting the project make far better decisions on materials, contractors, and scope.
- Why bay windows are different: They project outward and require structural support, flashing, and weatherproofing beyond a standard window.
- What planning matters most: Structural capacity, material choice, energy efficiency, and installation quality.
- What you will learn: 7 key considerations before starting, real cost ranges, and answers to common homeowner questions.
Why Bay Windows Require More Planning Than Standard Windows
Bay windows require more planning than standard windows because they add architectural complexity, structural load, and weatherproofing challenges that a flat window does not have. Understanding these differences up front leads to better decisions on materials, contractor selection, and installation scope.
How Bay Windows Differ From Standard Windows
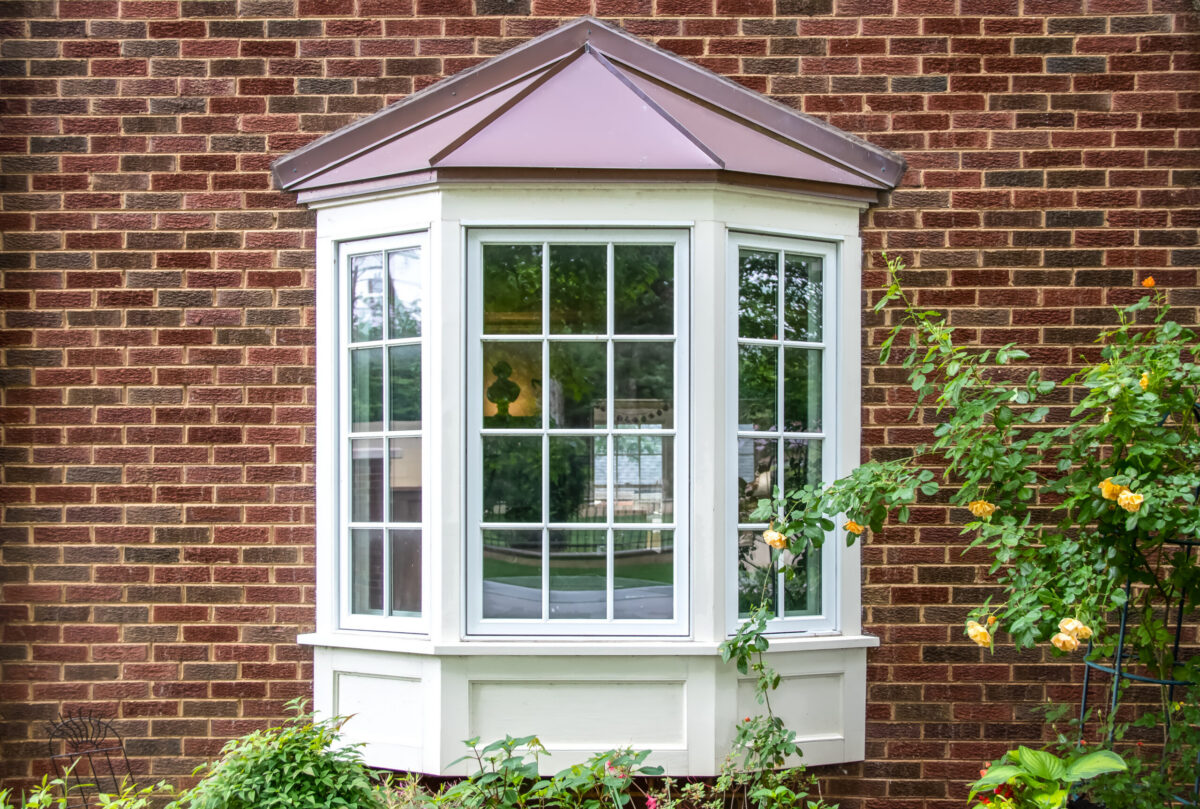
Bay windows differ from standard windows in that they project outward from the exterior wall, typically at 30 or 45 degree angles, creating an interior shelf or seat area and increasing the amount of daylight entering the room. Because the window projects past the wall plane, it does not sit within the existing rough opening the way a standard window does; instead, it hangs partially unsupported and must be held in place with a combination of headers, cables, knee braces, or brackets. The projecting structure also creates a small roof (the bay window “cab”) that must be properly framed, insulated, flashed, and roofed. Bay windows also weigh significantly more than the flat window they typically replace, sometimes 300 to 600 pounds for the assembly, so the surrounding wall structure must be able to support the added load. For homeowners in Dayton and surrounding areas, this structural aspect is often the single biggest planning consideration.
- 30 or 45 degree projection: Standard bay window angles.
- Hangs partially unsupported: Requires cables, braces, or brackets.
- Includes a small roof: Must be flashed and shingled properly.
- Significant weight: 300 to 600 pounds for the full assembly.
Why Installation Quality Determines Long-Term Performance
Installation quality determines long-term performance because bay windows are exposed to the elements on more sides than a flat window and any weakness in flashing, sealing, or structural support shows up as leaks, drafts, or sagging within a few years. According to the U.S. Department of Energy’s Building America Solution Center, old windows represent a substantial source of heat loss in winter and heat gain in summer because they provide 5 to 10 times less thermal protection than an insulated wall, and replacement windows must be installed in accordance with ASTM E2112-07(2016), the industry standard practice for installation of exterior windows, doors, and skylights. A bay window with poor flashing or inadequate insulation performs even worse than a comparable flat window because it has more surfaces exposed to weather. Choosing an experienced installer and specifying quality flashing, insulation, and support systems is the difference between a bay window that lasts 30+ years and one that fails at 10.
- ASTM E2112-07(2016): Industry standard for exterior window installation.
- 5 to 10 times less thermal protection: Old windows vs. insulated walls.
- More exposed surfaces: Increases weatherproofing importance.
- Quality installation: Difference between 10 year and 30+ year lifespan.
7 Things to Know Before Starting a Bay Window Installation
Seven specific considerations should be addressed before a bay window installation project begins. Working through each one in advance prevents surprises during the project and helps homeowners have informed conversations with contractors.
1. Your Home’s Structural Capacity to Support the Window
Your home’s structural capacity to support the window is the first thing to evaluate because bay windows add hundreds of pounds of load to the surrounding wall structure. The header above the window must be properly sized to carry the wall load above the opening, and the jack studs on either side must be able to distribute that load down to the foundation. In existing homes, the original header sized for a standard window is often not adequate for a larger bay window opening, meaning framing modifications are required. Support systems below the window (knee braces, brackets, or support cables) must also be able to hold the projecting weight without allowing the window to sag over time. A contractor should evaluate the existing framing before quoting the project, and in some cases a structural engineer may need to be consulted, especially for larger bay window installations or older homes.
- Header sizing: May need to be upgraded from existing.
- Jack studs: Distribute load down to foundation.
- Knee braces or cables: Support the projecting weight below the window.
- Engineer consultation: May be required for larger installations.
2. The Style and Angle That Fits Your Home
The style and angle that fits your home affects both the aesthetics and the interior space you gain from the installation. Standard bay windows use three panels (a large center picture window flanked by two smaller casement or double-hung windows) at either 30 or 45 degree angles. A 30 degree bay projects about 12 to 14 inches from the wall, while a 45 degree bay projects further and creates more interior seat space. Bow windows use four to six equal-sized windows in a gentle curve rather than sharp angles, creating a softer visual profile. Garden windows project the least and typically include shelving for plants. The right choice depends on the room, the exterior architecture, and how much interior space you want to gain. Rooms with existing seating arrangements benefit from deeper 45 degree bays, while rooms where the window is primarily for light might do fine with a 30 degree unit.
- 30 degree bay: Projects 12 to 14 inches; less interior space.
- 45 degree bay: Deeper projection; more interior seat space.
- Bow window: 4 to 6 equal panels in a curved arc.
- Garden window: Small projection with plant shelving.
3. Frame Material Options and Trade-Offs
Frame material options and trade-offs matter because the material determines the appearance, maintenance requirements, energy efficiency, and lifespan of the bay window. Vinyl is the most popular choice because it is affordable ($1,000 to $3,000 per bay window for the unit itself), requires almost no maintenance, and offers good energy efficiency through multi-chamber frame designs. Wood offers the most attractive interior appearance and excellent insulation but requires regular painting, sealing, and moisture protection to prevent rot. Clad wood combines a low-maintenance aluminum or vinyl exterior with a wood interior, giving the best of both worlds at a higher price point ($2,000 to $5,000 per unit). Fiberglass is the most durable and thermally stable option but also the most expensive. For homeowners in Dayton and surrounding areas, vinyl and clad wood are the most common choices due to the freeze-thaw climate.
- Vinyl: $1,000 to $3,000; low maintenance; most popular.
- Wood: Best interior appearance; requires maintenance.
- Clad wood: $2,000 to $5,000; wood interior, low-maintenance exterior.
- Fiberglass: Most durable and thermally stable; highest cost.
4. Energy Efficiency Features to Specify
Energy efficiency features to specify include the glass package, frame insulation, and ENERGY STAR climate zone certification. A bay window has more glass and more exterior surfaces than a standard flat window, so the energy efficiency choices have an outsized impact on heating and cooling costs. Low-E (low emissivity) coated glass reflects heat back into the home in winter and reflects solar gain out in summer, cutting energy loss significantly. Argon or krypton gas fills between double or triple panes further reduce heat transfer. ENERGY STAR certified windows matched to the Northern climate zone are essential for Ohio homes. The frame material also affects insulation performance, with multi-chamber vinyl, foam-filled vinyl, and fiberglass all outperforming aluminum. For a bay window investment, spending an extra $200 to $500 on premium glass and frame options typically pays back through energy savings within 5 to 10 years.
- Low-E glass: Reflects heat and blocks UV.
- Argon or krypton fill: Reduces heat transfer between panes.
- ENERGY STAR Northern zone: Essential for Ohio climate.
- Insulated frames: Multi-chamber, foam-filled, or fiberglass.
5. Weatherproofing and Flashing Requirements
Weatherproofing and flashing requirements are critical because bay windows have more exposed edges and joints than any other window type, and each joint is a potential water entry point. Proper flashing includes sill pan flashing at the base (to catch and drain any water that penetrates the frame), jamb flashing on the sides, head flashing at the top, and integration with the home’s weather-resistant barrier (house wrap) at every edge. The small roof cab above the window must be flashed at every seam and shingled with the same shingles used on the main roof. Interior air sealing with low-expansion foam prevents drafts, and exterior caulking at every joint completes the seal. Cutting corners on any of these steps almost guarantees leaks within a few years, so specifying quality flashing (self-adhered membrane, minimum 4 inches wide) and confirming the installer’s flashing approach in writing is important.
- Sill pan flashing: Catches and drains water at the base.
- Head flashing: Directs water away from the top of the window.
- Roof cab flashing: Prevents water infiltration on the projecting roof.
- Written flashing spec: Ask contractor to document approach.
6. Cost Considerations Beyond the Window Itself
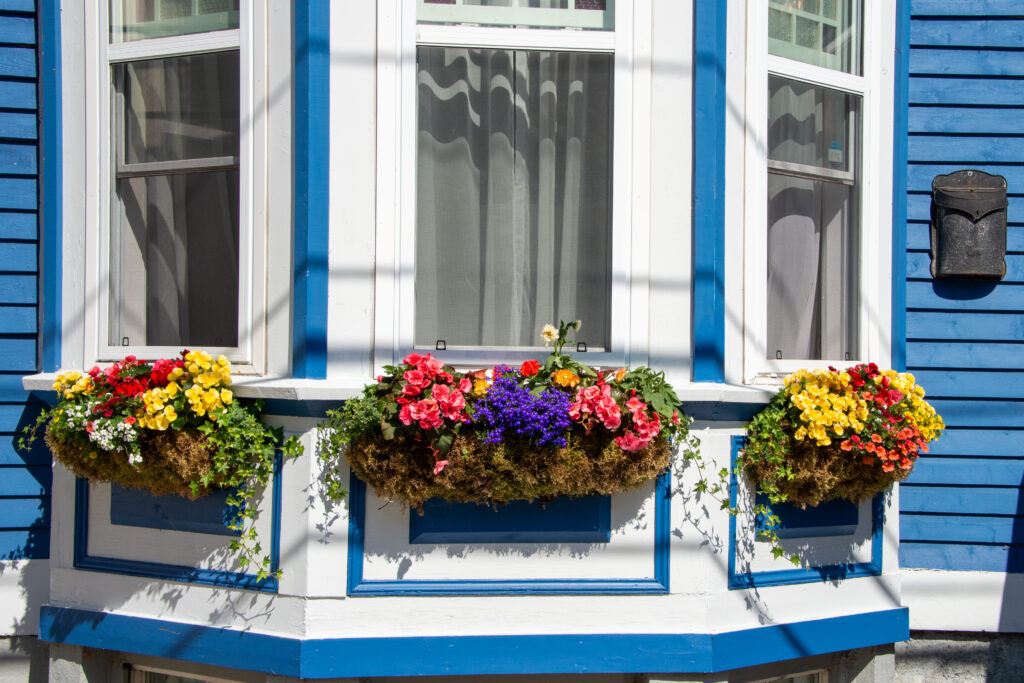
Cost considerations beyond the window itself often surprise homeowners because the installation labor, framing modifications, roof cab construction, and interior finishing add substantially to the total project cost. A typical bay window installation runs $1,500 to $6,000 total in the Dayton and surrounding areas market, with the window unit itself accounting for only about 30 to 50 percent of that cost. Additional costs include structural modifications ($500 to $2,000 if header upgrades are needed), the roof cab and shingles ($300 to $800), interior trim and finishing ($400 to $1,200), and exterior siding repair or replacement ($200 to $600). Larger or custom bay windows can push total costs to $8,000 or more. Getting a fully itemized estimate rather than a single lump sum helps homeowners understand where their money is going and compare quotes accurately.
- Total project cost: $1,500 to $6,000 typical range.
- Window unit only: 30 to 50 percent of total.
- Structural modifications: $500 to $2,000 if needed.
- Itemized estimate: Essential for accurate cost comparison.
7. Permits, Warranties, and Professional Installation
Permits, warranties, and professional installation protect the homeowner and preserve the value of the investment. Most municipalities in Dayton and surrounding areas require a building permit for bay window installations that involve structural modifications, and the permit process includes an inspection that verifies the framing, flashing, and installation meet code. Manufacturer warranties on bay windows typically run 10 to 20 years on the window itself and 20 years to lifetime on the glass, but most manufacturer warranties are voided if the installation is not performed according to the manufacturer’s instructions, which usually requires a professional installer. The contractor should also provide a workmanship warranty of 2 to 10 years covering the installation labor and flashing. DIY bay window installation is possible for experienced carpenters but strongly discouraged for homeowners without significant framing experience, because a mistake compromises structural integrity and voids warranties.
- Building permit: Usually required for structural modifications.
- Manufacturer warranty: 10 to 20 years on window, 20 to lifetime on glass.
- Installer warranty: 2 to 10 years on workmanship and flashing.
- DIY caution: High risk of voided warranty and structural mistakes.
How to Prepare for the Installation Day
How to prepare for the installation day involves a handful of simple steps that keep the project on schedule and minimize surprises. Most bay window installations take 1 to 3 days depending on complexity.
What to Do Before the Installer Arrives
Before the installer arrives, clear the interior area within 6 feet of the window (remove furniture, drapes, valuables, wall art) and cover any remaining items with drop cloths. Move breakable items well away from the work area. If the window is in a room with delicate flooring, protect the floor with cardboard or plastic runners along the path the installers will use. Contain pets in a separate room away from the work area for safety and to prevent them from escaping while doors are open. Communicate with the contractor in advance about parking, dumpster placement, and where materials can be staged. Confirm the project scope, warranty terms, and payment schedule in writing before work begins.
- Clear a 6 foot workspace: Interior of the window area.
- Cover remaining items: Drop cloths for dust protection.
- Floor protection: Cardboard or plastic runners.
- Written confirmation: Scope, warranty, and payment before starting.
What to Expect During Installation
During installation, the crew will typically start by removing the existing window from the outside, then frame any needed structural modifications, install the new bay window unit, add flashing and weatherproofing, construct the roof cab, and finish with interior and exterior trim. Expect noise, dust, and open exterior walls at various points in the process, with the window opening covered by tarp or plastic if the work stretches across days. A qualified installer will also verify that the window is level, plumb, and square before finishing, and will operate all sashes to confirm smooth function. The interior finishing work (trim, painting, staining) may be completed by the installer or left for the homeowner depending on the contract.
- Removal first: Existing window comes out from outside.
- Structural modifications: Framing changes if header needs upgrade.
- Weatherproofing: Flashing at every edge and joint.
- Final walkthrough: Verify level, plumb, square, and smooth operation.
Frequently Asked Questions
How Much Does a Bay Window Installation Cost?
A bay window installation typically costs $1,500 to $6,000 total in the Dayton and surrounding areas market, with the window unit itself running $1,000 to $3,000 and installation labor, framing modifications, roof cab, and finishing adding the rest. Premium materials (fiberglass or clad wood) and larger custom sizes push totals to $8,000 or more. Most homeowners spend around $3,000 to $4,500 for a mid-range vinyl or clad wood bay window professionally installed.
How Long Does Installation Take?
Installation takes 1 to 3 days for most bay window projects depending on complexity, existing framing conditions, and whether the roof cab needs to be built on-site or arrives pre-fabricated. Straightforward replacements (bay window in the same opening size as the existing one) can sometimes be completed in a single day, while installations requiring structural modifications or larger openings typically require 2 to 3 days.
Do I Need a Permit for a Bay Window?
Yes, you typically need a building permit for a bay window installation in most municipalities in Dayton and surrounding areas, especially if the installation involves modifying the existing framing, changing the opening size, or adding structural elements. The permit includes an inspection that verifies the work meets code. Your contractor should handle the permit application as part of the project.
Can I Install a Bay Window Myself?
You can install a bay window yourself only if you have significant carpentry and framing experience, understand structural load calculations, and can properly execute complex flashing details. Even for experienced DIYers, a bay window installation is one of the most challenging window projects, and mistakes lead to voided manufacturer warranties, water leaks, structural sagging, or code violations. Most homeowners hire a professional installer for these reasons.
Will a Bay Window Add Value to My Home?
Yes, a well-installed bay window typically adds value to your home by improving aesthetics, adding natural light, and creating additional interior space. Real estate industry data suggests that bay windows can recoup 50 to 70 percent of their cost in resale value, with the actual return depending on the room, the neighborhood, and the quality of the installation. Bay windows also make rooms feel larger and more inviting, which helps with staging and marketing when selling.
How Long Should a Bay Window Last?
A bay window should last 20 to 40 years for vinyl, 15 to 30 years for wood (longer with maintenance), 25 to 35 years for clad wood, and 30 to 50 years for fiberglass. Actual lifespan depends heavily on installation quality, climate, and maintenance. Bay windows with proper flashing and weatherproofing routinely reach the upper end of these ranges, while those with corner-cut installation often fail within 10 to 15 years.
Why Dayton Homeowners Trust Johnson Restoration for Bay Window Installation
A bay window is one of the highest-impact upgrades a homeowner can make, but it is also one of the most technically demanding installations because of the structural, weatherproofing, and finishing requirements involved. Johnson Restoration brings over a decade of industry experience to bay window installation and full window replacement projects in Dayton and surrounding areas, with workmanship warranties, financing options, and the expertise to specify ENERGY STAR certified windows and premium flashing that will protect your investment for decades. Whether you are considering your first bay window, replacing an aging unit, or comparing options for a larger renovation, contact Johnson Restoration today for a free estimate and let our team help you plan an installation that adds beauty, comfort, and lasting value to your home.