
“Wind damage roof repair” is the time-sensitive process of inspecting, documenting, tarping, filing an insurance claim, and properly repairing a roof after high winds lift shingles, tear off sections, or compromise flashing. Storms can move quickly, but the damage they leave behind tends to escalate slowly, with one missing shingle today turning into widespread water damage within a few rain cycles. Winds as low as 45 to 50 mph can begin lifting shingles, and wind speeds above 75 mph can tear off large sections of roofing and expose the deck below. Homeowners in Springboro and surrounding areas who follow the right repair sequence usually keep their out of pocket cost low and avoid the secondary damage that becomes expensive fast.
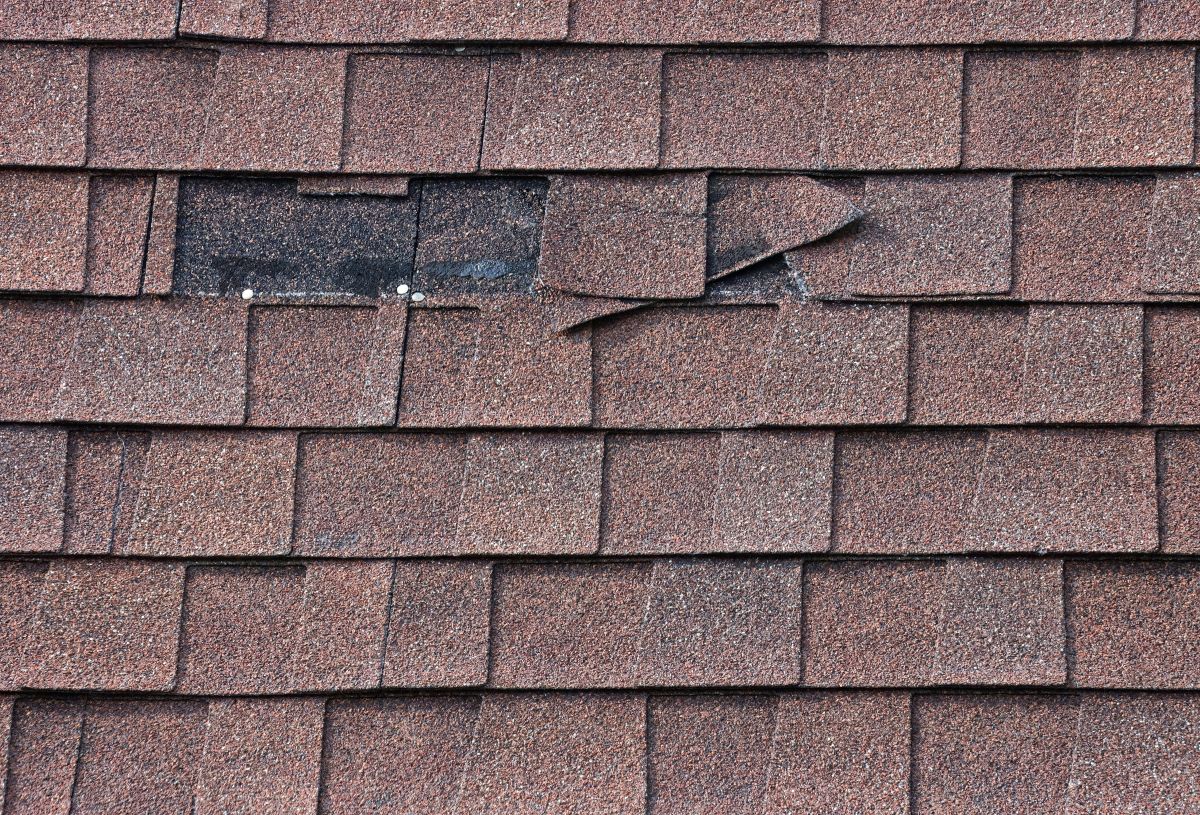
- What counts as wind damage: Lifted or missing shingles, creased tabs, damaged flashing, and torn underlayment.
- What insurance typically covers: Sudden wind damage from named storms, thunderstorms, and high straight-line winds.
- What you will learn: Wind speed thresholds, the 6 step repair process, insurance claim guidance, and answers to common homeowner questions.
How Wind Damage Affects Asphalt Shingle Roofs

Wind damage affects asphalt shingle roofs in predictable patterns once wind speeds reach 45 mph or higher, with each successive 10 mph threshold causing significantly more severe damage. Understanding what wind speeds cause what kinds of damage helps homeowners spot problems early.
What Wind Speeds Cause Roof Damage?
Wind speeds of 45 to 50 mph begin to lift loose or aged shingles, while speeds of 50 to 75 mph cause shingles to be ripped off and damage flashing, gutters, and other roof components. Wind speeds above 75 mph can tear off entire sections of roofing and potentially compromise the roof deck, and speeds over 90 mph pose a severe threat to the entire roof structure. Modern architectural asphalt shingles are typically rated for 110 to 130 mph when properly installed with the correct nailing pattern (6 nails per shingle), but actual wind resistance depends heavily on installation quality, age, and sealant integrity. Springboro and surrounding areas regularly see storm gusts in the 40 to 70 mph range, putting most homes in the wind speed window where minor to moderate shingle damage commonly occurs.
- 45 to 50 mph: Loose or aged shingles begin to lift.
- 50 to 75 mph: Shingles tear off; flashing, gutters, and ridge cap take damage.
- 75 to 90 mph: Large sections of roofing tear away; deck exposure is common.
- 90+ mph: Major structural damage to the roof and potentially the building.
How Common Is Roof Wind Damage?
Roof wind damage is the most common cause of homeowners insurance claims, with about 1 in 36 insured homes experiencing a wind or hail related property damage claim each year. According to the Insurance Information Institute, wind and hail accounted for 42.5 percent of all homeowners insurance losses in 2023, making it the single largest cause of residential property damage claims, with an average claim severity of $14,747. For homeowners in Springboro and surrounding areas, this means that a wind related insurance claim is far from unusual; it is, by the numbers, the most likely homeowners claim a property owner will ever file. Knowing the repair process before it happens makes the experience faster and less stressful when it does.
- 42.5 percent of losses: Wind and hail share of all homeowners claims in 2023.
- 1 in 36 homes per year: Frequency of wind or hail property damage claims.
- $14,747 average claim: Industry average severity for wind and hail losses.
- Most common claim type: Wind and hail outpaces water, fire, theft, and liability.
6 Steps for Wind Damage Roof Repair After a Storm
The wind damage roof repair process follows a specific sequence that protects the home, preserves the insurance claim, and ensures the repair holds long term. Skipping or reordering these steps almost always costs the homeowner money in denied claims, repeat damage, or rushed repairs that fail.
1. Inspect the Roof Safely From the Ground
Inspecting the roof safely from the ground is the first step because climbing onto a damaged roof can be dangerous and can also disturb evidence the insurance adjuster needs to see. Walk the full perimeter of the home and look for visible signs of damage including missing or lifted shingles, dark patches where granules have been stripped, debris in the gutters, bent or torn flashing around chimneys and vents, and shingles or shingle fragments on the lawn. Using binoculars from the ground or taking zoomed photos with a smartphone is the safest way to assess the upper roof without climbing. If significant damage is suspected, a professional inspection by a licensed roofing contractor is the next step rather than a DIY climb.
- Walk the full perimeter: Look from multiple angles for visible damage.
- Use binoculars or zoom photos: Safer than climbing on a damaged roof.
- Check the lawn: Shingle fragments, granules, and debris indicate impact.
- Inspect the attic: Daylight visible through the roof deck is a clear emergency.
2. Document All Damage With Photos and Video
Documenting all damage with photos and video locks in the evidence that supports a successful insurance claim. Take wide shots that establish the affected area of the roof, then close-ups of every missing shingle, creased tab, damaged flashing, and piece of debris. Include video as well as still photos, since video captures context and movement that adjusters find more persuasive. Record the date and time of the storm, save any local news reports or weather service data confirming the wind event in the area, and photograph any interior damage like ceiling stains or attic moisture as soon as it appears. Poor documentation is the leading reason wind damage claims get reduced or denied, so erring on the side of too many photos is the smart move.
- Wide and close shots: Establish context and capture detail.
- Video walkthrough: Adjusters value moving footage of damage.
- Save weather data: Local news, NOAA reports, or wind speed records support the claim.
- Photograph interior damage: Ceiling stains and attic moisture also matter.
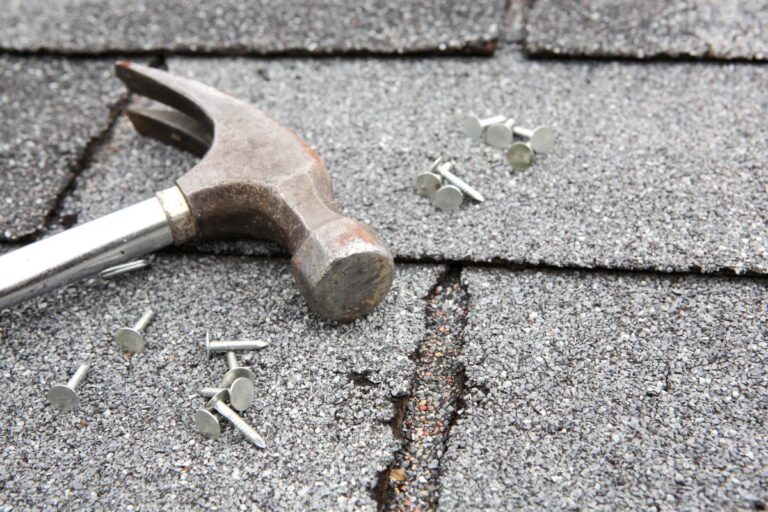
3. Tarp the Roof to Prevent Further Damage

Tarping the roof to prevent further damage is essential when shingles are missing, the underlayment is exposed, or rain is in the forecast within 24 to 48 hours. A heavy duty 6 mil or thicker polyethylene tarp should be secured over the damaged area with 2 x 4 boards along the edges (not driven through the roof itself, which can create additional damage), and the tarp should extend at least 4 feet beyond the damaged area in every direction. Most homeowners insurance policies require the homeowner to take reasonable steps to prevent further damage after a covered event, and failing to tarp a known leak can give the insurer grounds to reduce or deny the related water damage claim. Many professional restoration companies, including Johnson Restoration, offer emergency tarping services for homeowners who do not feel safe doing it themselves.
- 6 mil polyethylene tarp: Minimum thickness for storm protection.
- Secure with 2 x 4 boards: Avoid driving fasteners through the roof.
- Extend 4 feet past damage: Ensures water sheds onto undamaged roof.
- Required by insurance: Failing to mitigate damage can void coverage.
4. File the Insurance Claim Promptly
Filing the insurance claim promptly is critical because most policies require notification of damage within a specific window (often 30 to 60 days, but sometimes much shorter for named storm events). Call the insurance carrier as soon as the damage is documented, ask whether a wind or hail deductible applies, and request a claim number. Have ready: the date and time of the storm, photos and video of damage, any temporary repair receipts, and a written estimate from a licensed roofing contractor if possible. Be aware that wind and hail deductibles are often percentage-based (1 to 5 percent of the home’s insured value) rather than the flat dollar deductible that applies to other claims, so a $300,000 home with a 2 percent wind deductible has a $6,000 deductible for wind related claims.
- Call within 24 to 48 hours: Faster is better; some policies require it.
- Request a claim number: Track every conversation and document in writing.
- Save all receipts: Tarps, emergency repairs, and lodging are often reimbursable.
- Verify the deductible: Wind/hail deductibles are usually percentage-based.
5. Get a Professional Repair Estimate
Getting a professional repair estimate from a licensed and insured roofing contractor is the step that establishes the true scope and cost of the repair. The contractor should provide a written, itemized estimate that includes labor, materials, permits, and any deck repair needed once shingles are removed. Reputable contractors will also meet with the insurance adjuster on the roof, which often results in a more complete scope of damage being approved than would have been on a homeowner-only walkthrough. Avoid contractors who appear in the neighborhood unsolicited after a storm (commonly called storm chasers), require large up-front deposits, or pressure the homeowner to sign a contract before the insurance claim is approved. A trusted local contractor with a verifiable address in Springboro and surrounding areas is a safer choice than an out of town crew that will be hard to reach if warranty work is needed later.
- Written, itemized estimate: Required for a clean insurance approval.
- Adjuster meeting: Contractor presence often increases approved scope.
- Avoid storm chasers: Out of town crews disappear when warranty issues arise.
- Verify license and insurance: Always confirm before signing any contract.
6. Complete the Repair and Verify the Work
Completing the repair and verifying the work is the final step, and it covers everything from the actual installation to the post-repair inspection that confirms the roof is watertight. Quality wind damage repairs include replacing all damaged shingles with matching products, re-sealing any lifted shingles that were not torn off, installing new starter strips and ridge cap where needed, and repairing any flashing, drip edge, or underlayment damaged by the storm. After the work is complete, the homeowner should receive a final invoice, a copy of the manufacturer warranty documentation, and a workmanship warranty from the contractor. A walkthrough with the contractor on the ground (or, where safe, on the roof) confirms that the scope was completed and that visible damage has been resolved.
- Matching shingles: Color and product must align with the existing roof.
- Re-seal lifted shingles: Hand sealing prevents future lift on adjacent areas.
- Workmanship warranty: Required from a reputable contractor.
- Final walkthrough: Confirms the repair before signing off.
Signs of Wind Damage to Watch For
Wind damage is not always obvious from the ground, and recognizing subtle signs can be the difference between filing a successful insurance claim and missing the window for coverage entirely. The most damaging wind events often leave behind clues that look minor at first glance but quickly compound.
Why Creased Shingles Are a Hidden Wind Damage Sign
Creased shingles are a hidden wind damage sign because they look intact from the ground but have actually been bent upward by wind and then dropped back down, breaking the sealant bond underneath. A creased shingle will appear normal in a photograph but is no longer sealed to the shingle below it, which means the next significant rain or wind event can lift it again and allow water underneath. Adjusters and roofing professionals identify creased shingles by lifting them gently to check the sealant bond, which should snap audibly when broken. In Springboro and surrounding areas, wind events that produce creased shingles often go unreported by homeowners who only look for missing shingles, and the resulting hidden damage shows up as leaks 6 to 18 months later.
- Looks intact from ground: Easy to miss in a basic inspection.
- Broken sealant bond: Even though the shingle is still in place.
- Identified by lifting: Professionals check the bond manually.
- Delayed leaks: Often show up 6 to 18 months after the storm.
What Are the Less Obvious Signs of Wind Damage?
Less obvious signs of wind damage include granule loss accumulating in gutters and downspouts, slightly lifted ridge cap shingles, exposed nail heads where sealant has popped, bent or twisted vent boots and pipe flashing, and damaged or detached drip edge along the eaves. Indoor warning signs include new ceiling stains, attic insulation that feels damp, and previously dry attic spaces that suddenly show water marks on the underside of the deck. Tree debris on the roof is also a sign worth investigating because branches can puncture or abrade the shingles even after they have been removed. A professional post-storm inspection catches all of these issues that a ground-only homeowner check typically misses.
- Granule loss in gutters: Indicates accelerated wear from storm impact.
- Lifted ridge cap: Often the first area to lift in high winds.
- Exposed nail heads: Sealant has popped and the nail is now a leak path.
- Damp attic insulation: Sign of active or recent water intrusion.
Frequently Asked Questions

Does Homeowners Insurance Cover Wind Damage to My Roof?
Homeowners insurance typically covers wind damage to your roof when the damage is caused by a sudden and accidental event like a thunderstorm, tornado, hurricane, or high straight-line winds. Coverage usually excludes damage from gradual wear, lack of maintenance, or pre-existing conditions. Wind and hail deductibles are often percentage based (1 to 5 percent of the home’s insured value) and apply separately from the standard policy deductible.
How Long Do I Have to File a Wind Damage Insurance Claim?
You typically have between 30 days and 1 year to file a wind damage insurance claim, but most policies require prompt notification (often 24 to 72 hours) followed by formal filing within the policy’s stated window. Named storm and hurricane events sometimes have shorter deadlines. Filing as soon as damage is identified is the safest practice because delays give the insurer grounds to argue the damage worsened from neglect.
Can I Repair Wind Damaged Shingles Myself?
Repairing wind damaged shingles yourself is possible for one or two replacement shingles in an easily accessible area with no underlying deck or flashing damage. Anything beyond a basic shingle replacement, including creased shingles, damaged flashing, or multiple courses of missing shingles, should be handled by a licensed roofing contractor. DIY repairs that leave gaps or improper sealing are a leading cause of post-storm leaks that show up months later.
How Much Does Wind Damage Roof Repair Cost?
Wind damage roof repair typically costs $300 to $1,500 for small repairs like replacing a few shingles or repairing a small section of flashing, and $1,500 to $7,500 or more for repairs involving larger areas, ridge cap, or significant flashing work. The average wind and hail insurance claim severity is $14,747 according to the Insurance Information Institute, reflecting the wider range of damage that often occurs in major storms. Most homeowners pay only their wind/hail deductible out of pocket.
Will Filing a Wind Damage Claim Raise My Insurance Premium?
Filing a wind damage claim may raise your insurance premium modestly, typically 5 to 10 percent depending on the carrier, the size of the claim, and your claims history. Many states regulate how much premiums can rise after a weather-related claim, which is generally treated differently than at-fault liability claims. The cost of paying for a major repair out of pocket usually outweighs the long term premium increase.
Should I Replace or Repair My Roof After Wind Damage?
Replace versus repair depends on the extent of the damage, the age of the roof, and the matching shingle availability. If wind damage affects more than 25 to 30 percent of the roof, or if the roof is over 15 years old with widespread granule loss, full replacement is typically the better long-term value. Most insurance policies cover replacement when damage is widespread or when matching shingles cannot be sourced.
Why Springboro Homeowners Trust Johnson Restoration for Wind Damage Repair
Wind damage to a roof is one of the most common and most stressful homeowner emergencies, and the steps taken in the first 48 hours often determine whether the experience is a smooth insurance claim or a months-long headache. Johnson Restoration brings over a decade of industry experience to wind damage repair in Springboro and surrounding areas, with workmanship warranties, financing options, emergency tarping services, and the insurance claim experience needed to make sure your repair is approved and completed correctly the first time. If a storm has lifted shingles, torn flashing, or left debris on your roof, contact Johnson Restoration today for a free estimate and let our team handle the inspection, documentation, and repair from start to finish.