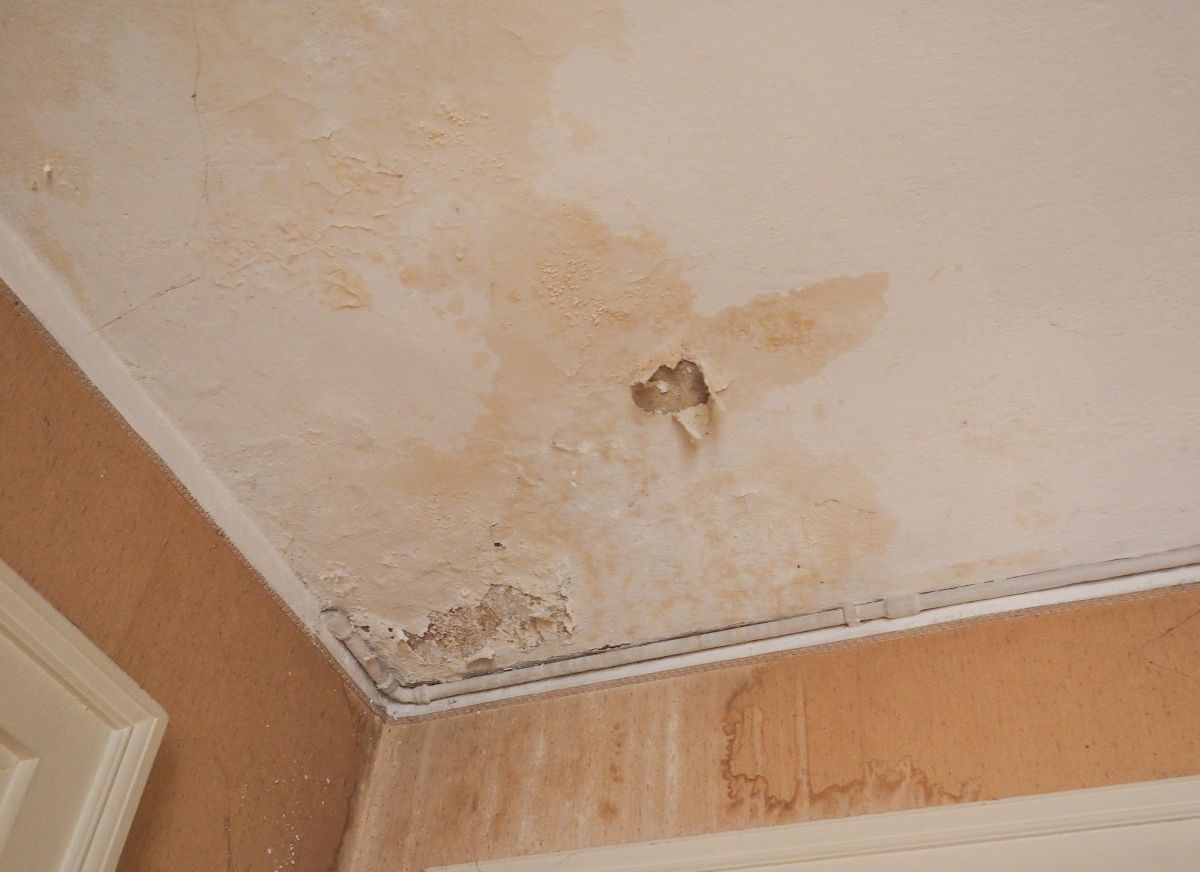

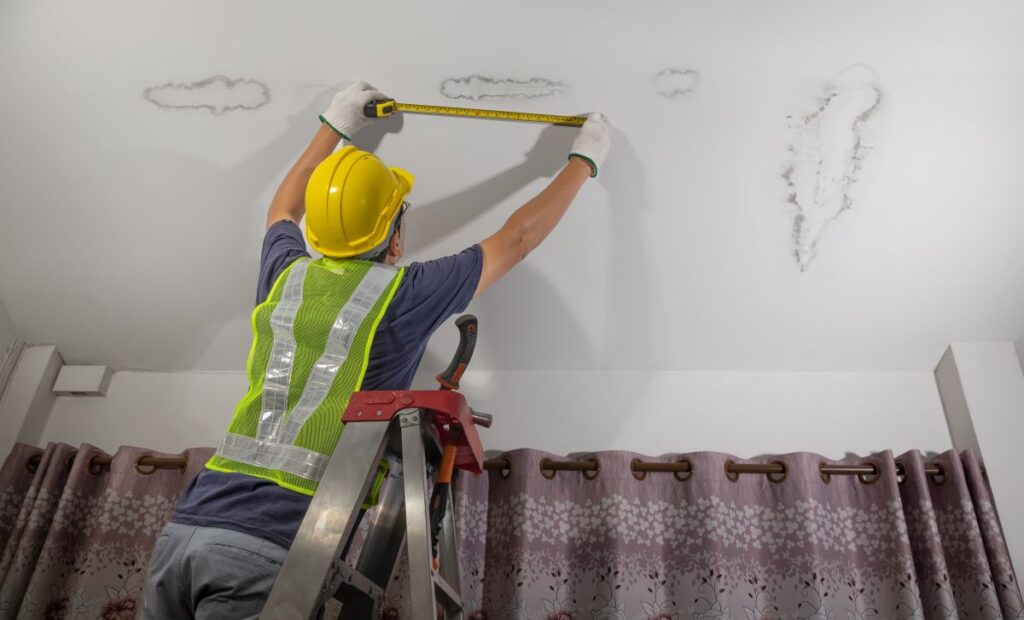
Condensation stains on ceiling surfaces are yellowish brown or grayish marks caused by moisture from inside the home (not a roof leak) settling on the underside of the drywall and slowly discoloring the paint. They often appear in random spots in the middle of a ceiling, near bathroom exhaust vents, or along the perimeter of a room where attic air meets warm interior air. Unlike a true roof leak, condensation stains develop gradually over weeks or months and tend to come back even after the ceiling is repainted, because the underlying ventilation or humidity issue has not been fixed. Homeowners in Sugarcreek and surrounding areas who address both the stain and the moisture source can keep their ceilings clean long term, rather than chasing the same stain year after year.
- What causes them: Poor attic ventilation, inadequate insulation, high indoor humidity, or improperly vented exhaust fans.
- What this guide covers: 7 proven removal methods, the difference between condensation and roof leak stains, prevention tips, and answers to common questions.
- Why the source matters: Removing the stain without fixing the moisture source guarantees the stain will return.
What Causes Condensation Stains on Ceilings?
Condensation stains on ceilings form when warm, moisture-laden interior air rises, meets a cool ceiling surface, and deposits water droplets that gradually leave behind staining minerals and contaminants. Understanding the underlying causes is essential because removing the stain without fixing the root issue almost guarantees it will come back.
How Does Indoor Humidity Cause Ceiling Stains?
Indoor humidity causes ceiling stains when relative humidity inside the home rises above the recommended range, allowing moisture in the air to condense on cooler surfaces like the ceiling. The U.S. Environmental Protection Agency recommends keeping indoor humidity between 30 and 50 percent, noting that high humidity keeps the air moist and increases the likelihood of mold. When humidity climbs above 60 percent (common in homes with daily showers, cooking, dishwashing, and dryers vented indoors), water vapor condenses on the coolest available surface, which is often the ceiling beneath an under-insulated or poorly ventilated attic. In Sugarcreek and surrounding areas, this is particularly common during the winter when warm interior air meets a cold ceiling beneath a frigid attic.
- Recommended humidity range: 30 to 50 percent indoor relative humidity.
- Mold risk threshold: 60 percent humidity for prolonged periods.
- Common sources: Showers, cooking, dishwashers, dryers, humidifiers, hang-dried laundry.
- Why ceilings stain first: They are typically the coolest interior surface in winter.
Why Poor Attic Ventilation Creates Random Ceiling Spots
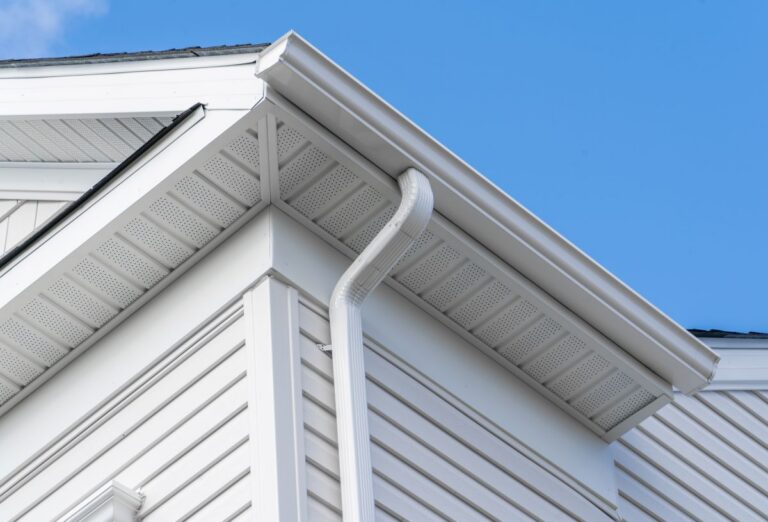
Poor attic ventilation creates random ceiling spots because trapped moisture in the attic condenses on the underside of the roof deck and the top of the ceiling drywall, eventually working its way through the drywall as a brown or gray stain. Random spots in the middle of a ceiling (rather than near a wall or roof feature) are a classic sign of attic ventilation problems, not a roof leak. Properly ventilated attics use a balanced intake (soffit vents) and exhaust (ridge or gable vents) system to move air continuously through the attic, carrying moisture out before it can condense. An attic with blocked soffit vents, insufficient ridge venting, or air leaks from bathroom or kitchen exhausts venting into the attic instead of outside is a recipe for condensation stains.
- Random center spots: Classic attic ventilation issue, not roof leak.
- Balanced ventilation: Soffit intake plus ridge or gable exhaust required.
- Blocked soffit vents: Often caused by insulation pushed too close to the eaves.
- Misrouted exhaust fans: Bathroom and kitchen fans must vent outside the house, not into the attic.
How to Tell a Condensation Stain From a Roof Leak
Telling a condensation stain from a roof leak matters because the two problems have completely different solutions, and treating one as the other is a fast way to waste money. The visual clues, location, and timing of the stain all provide information about what is actually causing it.
What Does a Condensation Stain Look Like?
A condensation stain looks like a yellowish brown, grayish, or slightly fuzzy spot that appears gradually over weeks or months, often in the middle of a ceiling rather than near a roof feature. Condensation stains tend to be small to medium in size, have soft edges, and may appear in clusters or random patterns rather than along an obvious water path. They are also more common in winter months in cold climates and summer months in hot, humid climates, both of which are peak seasons for the temperature differential that causes condensation. Roof leak stains, by contrast, typically have sharp tea-colored rings, appear shortly after rain, and form below specific roof features like vents, valleys, chimneys, or skylights.
- Gradual appearance: Develops over weeks or months, not in a single rain event.
- Random or clustered pattern: No clear connection to a roof feature.
- Seasonal pattern: Peaks in winter (cold climates) or humid summers.
- Soft, fuzzy edges: Distinct from sharp tea-colored rings of a roof leak.
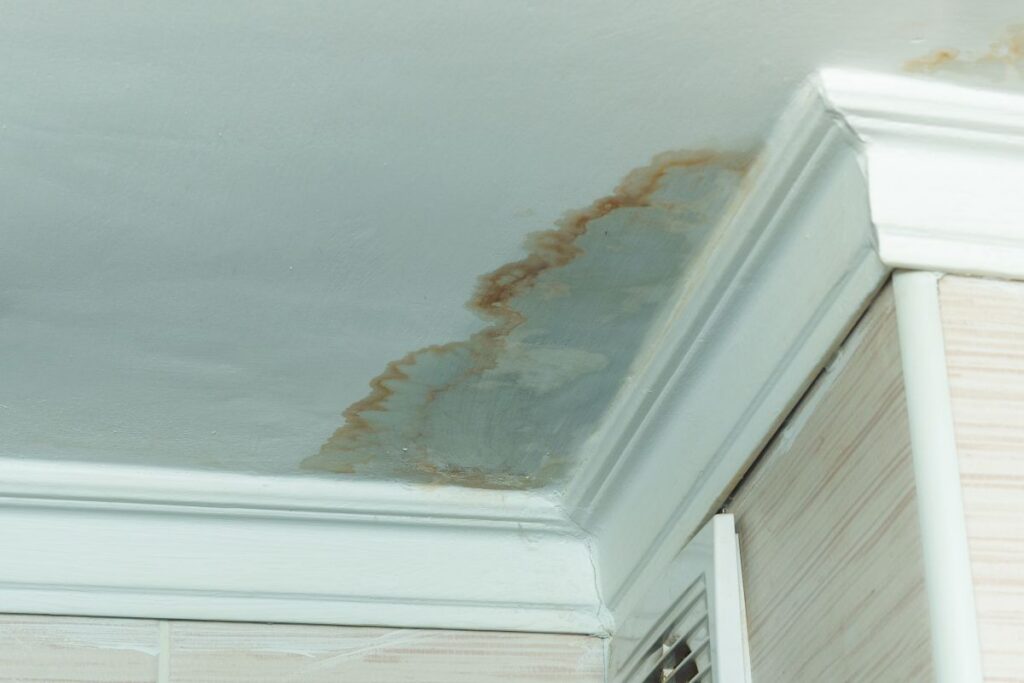
When Should I Suspect a Roof Leak Instead?
You should suspect a roof leak instead when the stain appears suddenly after rain, has a clear tea-colored ring shape, is located directly beneath a roof penetration (chimney, vent, skylight, or valley), or expands rapidly during or after a storm. Roof leaks also tend to cause sagging drywall, active dripping, and a peak-and-wane pattern that matches the weather, while condensation stains stay more or less the same regardless of recent rain. A professional inspection can determine the source of a stain by checking the attic for moisture, looking for wet insulation or roof sheathing, and tracing the path of any visible water. In Sugarcreek and surrounding areas, ruling out a roof leak first is always the safer move before assuming the cause is condensation.
- Sudden appearance after rain: Strongly suggests a roof leak.
- Tea-colored rings: Classic leak pattern, not condensation.
- Under a roof feature: Stain below a chimney, vent, or valley is suspicious.
- Active dripping: Always investigated as a leak first.
7 Ways to Remove Condensation Stains From Ceilings
Removing a condensation stain from a ceiling requires both cleaning the affected area and sealing it so the discoloration does not bleed back through new paint. These seven methods cover the full spectrum from light staining to deeper, more set in marks.
1. Clean With a Mild Dish Soap and Water Solution
Cleaning with a mild dish soap and water solution is the first step for any light or recent condensation stain because it removes surface dust, oils, and minor discoloration without damaging the paint underneath. Mix one teaspoon of mild liquid dish soap with one cup of warm water, then lightly dampen a soft sponge and blot (not scrub) the stained area. Work outward from the center of the stain to avoid spreading it, and rinse the sponge frequently. Allow the area to dry completely, and check whether the stain has lifted enough to skip the more aggressive treatments. This method works best on flat or eggshell paint and on stains less than 1 month old.
- Dish soap and water: 1 tsp soap to 1 cup warm water.
- Blot, do not scrub: Prevents lifting the paint along with the stain.
- Work outward from center: Avoids spreading the stain.
- Best for: Light or recent stains less than 1 month old.
2. Apply a Vinegar and Water Solution
Applying a vinegar and water solution is the next step when dish soap alone does not lift the stain, because the mild acidity in vinegar dissolves mineral deposits and light biological growth that contribute to discoloration. Mix one part white distilled vinegar with three parts warm water, dampen a clean cloth, and gently blot the stained area. The vinegar smell will dissipate within a few hours, and the solution is safe for most painted surfaces. This method is also useful for cleaning around bathroom and kitchen exhaust vents where condensation stains often accumulate. Test a small inconspicuous area first to confirm the paint does not lift or change color.
- 1:3 vinegar to water: Standard ratio for ceiling stain treatment.
- Test first: Confirm paint tolerance on a small area.
- Effective for mineral deposits: Common in condensation stains.
- Safe for most surfaces: Flat, eggshell, and satin paints typically tolerate it well.
3. Use a Diluted Bleach Solution for Set-In Stains
Using a diluted bleach solution for set-in stains is the right approach when vinegar does not work and the stain has been present for several months or longer. Mix one cup of regular household bleach with three cups of warm water, dampen a soft sponge, and blot the stained area working from the outside inward. Ventilate the room well, wear gloves and eye protection, and never combine bleach with ammonia or other cleaners (which can create toxic fumes). Bleach is particularly effective at killing any mildew that has begun to grow in the moisture-affected area, which is a common companion to condensation stains. Allow the area to dry fully (typically 4 to 8 hours) before assessing whether further treatment is needed.
- 1:3 bleach to water: Standard cleaning ratio for set-in stains.
- Always ventilate: Open windows and run an exhaust fan.
- Never mix with ammonia: Combination produces toxic fumes.
- Kills surface mildew: Common alongside condensation stains.
4. Prime With a Stain Blocking Primer
Priming with a stain blocking primer is the essential step before repainting because regular latex primer will allow the stain to bleed through new paint, even after the surface has been thoroughly cleaned. Oil based primers (like KILZ Original) and shellac based primers (like Zinsser BIN) are the two products reliable for permanently blocking condensation stains. Apply a single coat of primer with a small roller or brush, focusing on the stained area plus 2 to 3 inches beyond the visible edge to account for any hidden discoloration. Allow the primer to dry per the manufacturer’s instructions (typically 1 to 4 hours) before assessing whether a second coat is needed. Skipping this step is the most common cause of repaint failures, with stains often bleeding back through within days.
- Oil based primer (KILZ Original): Reliable stain blocker for most ceilings.
- Shellac based primer (Zinsser BIN): Best for deep or oily stains.
- Extend 2 to 3 inches past visible stain: Covers hidden discoloration.
- Never use latex primer: Allows stains to bleed through new paint.
5. Repaint With Matching Ceiling Paint
Repainting with matching ceiling paint restores the appearance and seals the area against future minor discoloration. Use a flat finish ceiling paint that matches the existing ceiling color (typically labeled “ceiling white” rather than standard white, which has a different undertone), and apply two thin coats with a roller for an even finish. Spot painting just the stained area often creates a visible patch because new paint reflects light differently than aged paint nearby, so painting the full ceiling section between corners or seams produces a more seamless result. Wait the full recoat time between coats (usually 4 hours for latex paint), and allow at least 24 hours of curing time before assessing the final appearance.
- Use ceiling-specific paint: Flat finish that hides imperfections.
- Two thin coats: Better coverage than one heavy coat.
- Paint full ceiling section: Avoids visible patch effect.
- 24 hour cure time: Final color and sheen settle within a day.
6. Address Persistent Mildew With an Antimicrobial Treatment
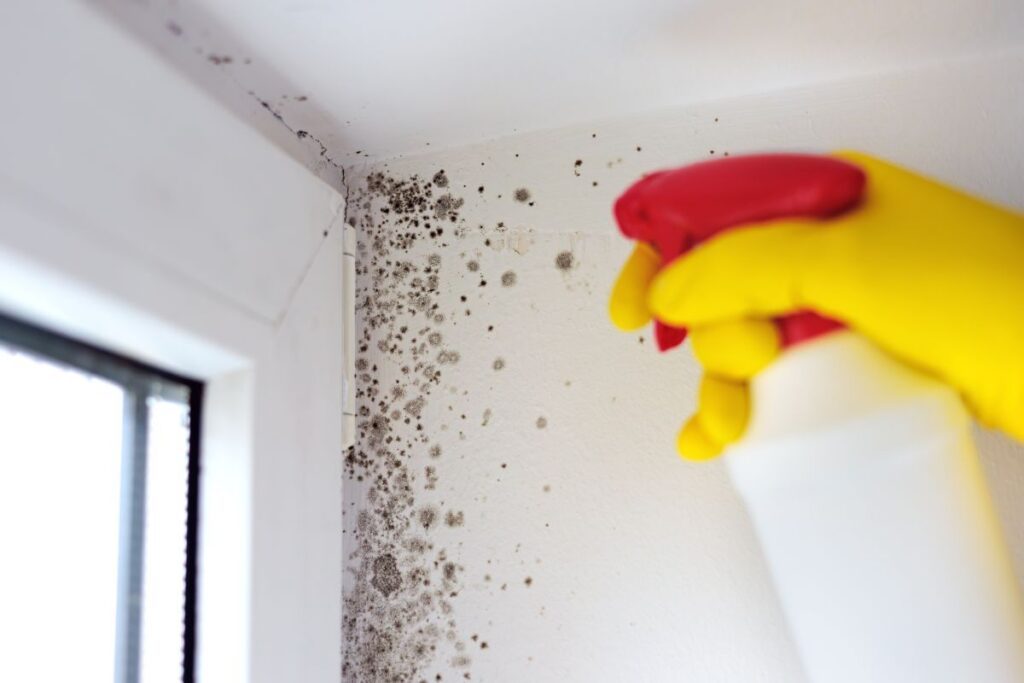
Addressing persistent mildew with an antimicrobial treatment is necessary when the condensation stain has supported active mildew growth visible as black or greenish spots. Commercial mildew removers or a 1:10 bleach to water solution applied with a soft brush will kill the mildew, but the area must then be treated with a mildew resistant primer (many stain blocking primers include this) before repainting. Mildew often returns if only the surface growth is killed without addressing the moisture source above, so combining the antimicrobial step with attic ventilation or humidity control fixes is essential. Areas larger than 10 square feet of visible mildew should be handled by a professional remediator per EPA guidelines.
- Visible black or greenish spots: Indicate active mildew growth.
- Commercial mildew remover: Apply per product instructions.
- Mildew resistant primer: Prevents regrowth under new paint.
- 10 square feet rule: Larger areas need professional remediation.
7. Replace the Drywall for Severe or Recurring Stains
Replacing the drywall for severe or recurring stains is the last resort when the ceiling has been stained, repainted, and re-stained multiple times, indicating the drywall itself has absorbed enough moisture to be permanently compromised. Cutting out the affected drywall section (typically a 2 by 2 foot or larger panel), inspecting and drying the attic side, then installing new moisture resistant drywall is the only way to fully reset a heavily damaged ceiling. This is also the right time to verify and improve attic ventilation, since cutting open the ceiling provides direct access to the attic floor. Most homeowners pair this work with an attic ventilation upgrade and a professional inspection of the home’s overall moisture management.
- Severe or recurring stains: Indicate compromised drywall.
- Moisture resistant drywall: Better suited for humidity-prone ceilings.
- Inspect the attic above: Access lets you fix the underlying cause.
- Pair with ventilation upgrade: Solves both symptom and source.
How to Prevent Condensation Stains From Returning
Preventing condensation stains from returning requires fixing the underlying moisture problem, not just cleaning the visible mark. The same conditions that caused the first stain will cause another within weeks or months if left unchanged.
Why Attic Ventilation Upgrades Are the Best Long Term Fix
Attic ventilation upgrades are the best long term fix because they address the root cause of most condensation stains, which is trapped moist air meeting cold attic surfaces. A balanced ventilation system uses soffit vents at the eaves (intake) and ridge or gable vents at the top (exhaust) to provide continuous airflow that carries moisture out of the attic before it can condense. Most building codes call for 1 square foot of net free vent area per 150 square feet of attic floor (or 1 to 300 when a vapor barrier is properly installed), split roughly evenly between intake and exhaust. Adding ventilation alone often will not solve a condensation problem if the soffit vents are blocked by insulation, so an inspection by a roofing or insulation professional is usually the first step in a meaningful upgrade.
- Balanced system: Soffit (intake) plus ridge or gable (exhaust) vents.
- Code minimum: 1 sq ft of vent area per 150 sq ft of attic.
- Check for blocked soffits: Insulation often pushes too close to the eaves.
- Professional assessment: Identifies hidden ventilation problems.
How to Control Indoor Humidity Year Round
Controlling indoor humidity year round is the homeowner’s most direct lever against ceiling condensation, and it requires both adding moisture removal sources and reducing moisture production. Running bathroom exhaust fans for at least 15 minutes after every shower, using kitchen range hoods that vent outdoors during cooking, and operating a dehumidifier in summer (or running the air conditioner more aggressively) all pull humidity out of the home. Avoiding interior moisture sources (hang-dried laundry, indoor humidifiers running too high, unvented gas appliances) reduces the load on the building’s ventilation system. An inexpensive hygrometer ($10 to $30) lets homeowners monitor humidity in real time, and aiming for the EPA-recommended 30 to 50 percent range is a reliable target year round.
- Bathroom fan run time: 15 to 20 minutes minimum after every shower.
- Range hood vented outdoors: Captures cooking moisture before it spreads.
- Hygrometer monitoring: Real-time indoor humidity tracking for $10 to $30.
- Avoid indoor moisture sources: Hang-dried laundry, over-set humidifiers.
Frequently Asked Questions
How Do I Know If My Ceiling Stain Is Condensation or a Leak?
You can tell a condensation stain from a leak by looking at the timing, location, and pattern of the stain. Condensation stains develop gradually over weeks or months, appear in random spots away from roof features, and are most common in winter or humid summer. Roof leaks appear suddenly after rain, form below specific roof penetrations, and often have sharp tea-colored rings. A professional inspection can confirm the source if the visual clues are inconclusive.
Will Painting Over a Condensation Stain Make It Go Away?
Painting over a condensation stain without a stain blocking primer will not make it go away; the stain almost always bleeds back through the new paint within days or weeks. Stain blocking primers (oil based or shellac based) are required to permanently cover the discoloration. Even with proper priming, the stain will return if the underlying moisture source is not also addressed.
Are Condensation Stains a Health Hazard?
Condensation stains themselves are cosmetic, but they can indicate underlying moisture conditions that support mold growth, which is a health concern. Visible black or greenish spots on or near a condensation stain suggest active mold or mildew that should be addressed promptly. Homeowners with asthma, allergies, or weakened immune systems should be especially proactive about resolving the moisture source.
Can I Use Magic Eraser on a Condensation Stain?
You can use a Magic Eraser on a condensation stain for light staining, but it works mechanically (similar to fine sandpaper) and can remove paint along with the stain. Test a small inconspicuous area first, and apply light pressure to avoid creating a visible bare spot that will need repainting. Magic Eraser is better suited for fingerprints and scuff marks than for set-in moisture stains.
How Much Does It Cost to Fix the Underlying Cause of Ceiling Condensation?
The cost to fix the underlying cause of ceiling condensation ranges from $200 to $500 for a simple bathroom fan reroute, $500 to $2,000 for added attic insulation, and $1,000 to $3,500 for a complete attic ventilation upgrade. Severe cases involving drywall replacement and full attic remediation can run $3,000 to $8,000. Most homeowners in Sugarcreek and surrounding areas resolve the underlying issue for under $2,500.
How Often Should I Check My Attic for Moisture?
You should check your attic for moisture at least twice a year (spring and fall), plus after any major weather event or noticeable change in interior comfort. Look for damp insulation, dark stains on the roof sheathing, rusted nail tips, or musty odors. Catching attic moisture early prevents the cascade of ceiling stains, mold growth, and structural rot that gradual exposure produces.
Why Sugarcreek Homeowners Trust Johnson Restoration for Ceiling and Attic Moisture Issues
Condensation stains on a ceiling are usually a symptom of something more fundamental, an attic ventilation issue, insulation gap, or indoor humidity imbalance that will keep causing problems until it is properly diagnosed and fixed. Johnson Restoration brings over a decade of industry experience to attic moisture and ceiling restoration in Sugarcreek and surrounding areas, with workmanship warranties, financing options, and the expertise to identify whether you are dealing with a leak, condensation, or a combined moisture problem. If you are seeing recurring spots on your ceiling, suspected attic condensation, or visible mold growth, contact Johnson Restoration today for a free estimate and let our team help you fix the cause, not just the stain.