
Emergencyceiling water damage repair after a roof leak is the time-sensitive process of stopping the active leak, drying the structure, removing compromised materials, and restoring the ceiling before mold takes hold or the framing rots. When a roof leak shows up as a brown stain, a sagging spot, or actively dripping water through the ceiling, every hour matters. Drywall absorbs water within minutes, insulation holds it for days, and mold can begin colonizing wet materials in as little as 24 hours. Homeowners in Mason and surrounding areas who handle the first 24 to 48 hours correctly often avoid thousands of dollars in additional damage that builds quietly behind the drywall.
- The first 24 hours: Stopping water flow, containing damage, and starting the drying process.
- What needs to come out: Saturated drywall, wet insulation, and any materials that can’t be dried within 48 hours.
- What you will learn: The full emergency repair process, warning signs of hidden damage, real cost ranges, and answers to common homeowner questions.
Why Speed Matters After a Ceiling Leak
Speed matters after a ceiling leak because water damage is progressive, and each phase of damage costs significantly more than the last. The longer water sits in your ceiling cavity, the more it spreads, the more it weighs, and the more it invites secondary problems like mold and structural rot.
What Happens to a Ceiling After a Roof Leak?
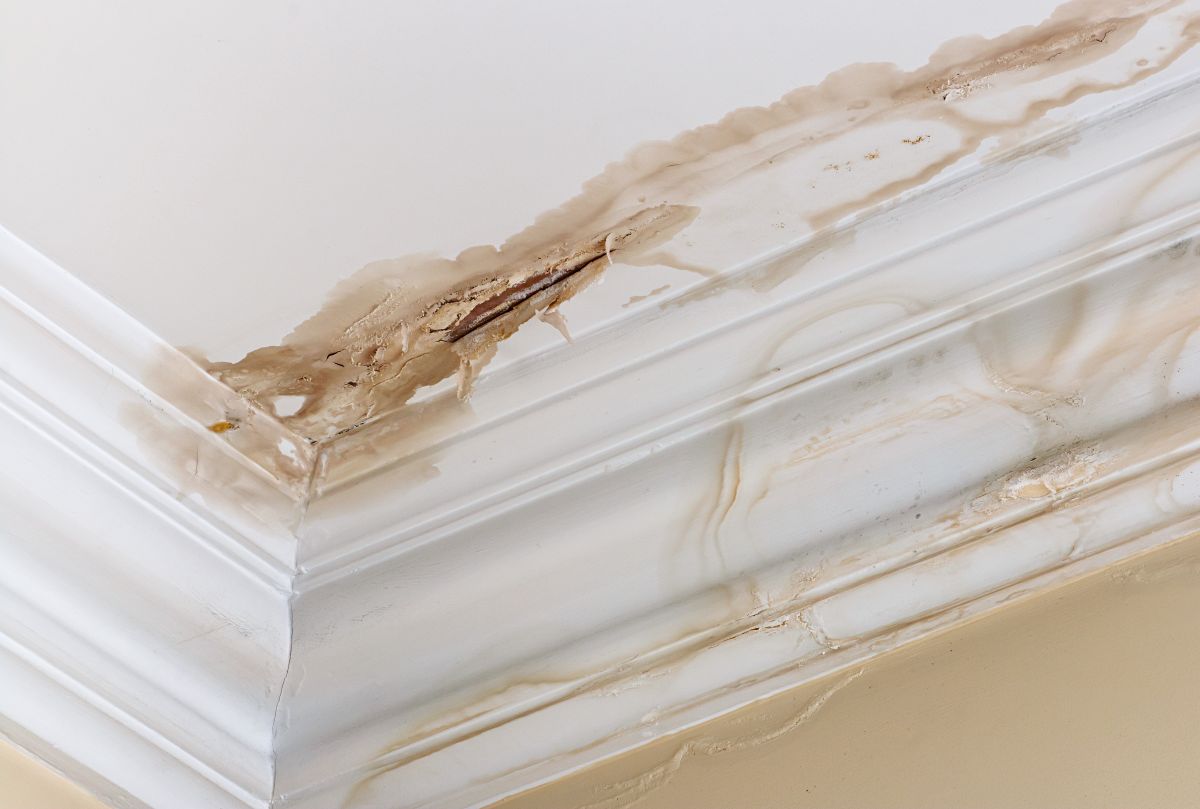
A ceiling after a roof leak goes through four predictable stages of damage that progress within hours and days. In the first 1 to 6 hours, water saturates the drywall and begins spreading horizontally along the top of the ceiling, often traveling 5 to 10 feet from the actual leak source before showing a visible stain. Within 12 to 24 hours, drywall begins to lose structural integrity, paint starts bubbling, and insulation becomes fully saturated and ineffective. By 24 to 48 hours, mold spores in the now-damp materials begin germinating, and within 72 hours, visible mold colonies can form on drywall, insulation, and framing. After a week, framing members begin to absorb moisture deeply enough to risk warping or rot.
- Hours 1 to 6: Water spreads horizontally; visible stain may appear far from the leak source.
- Hours 12 to 24: Drywall weakens, paint bubbles, insulation saturates.
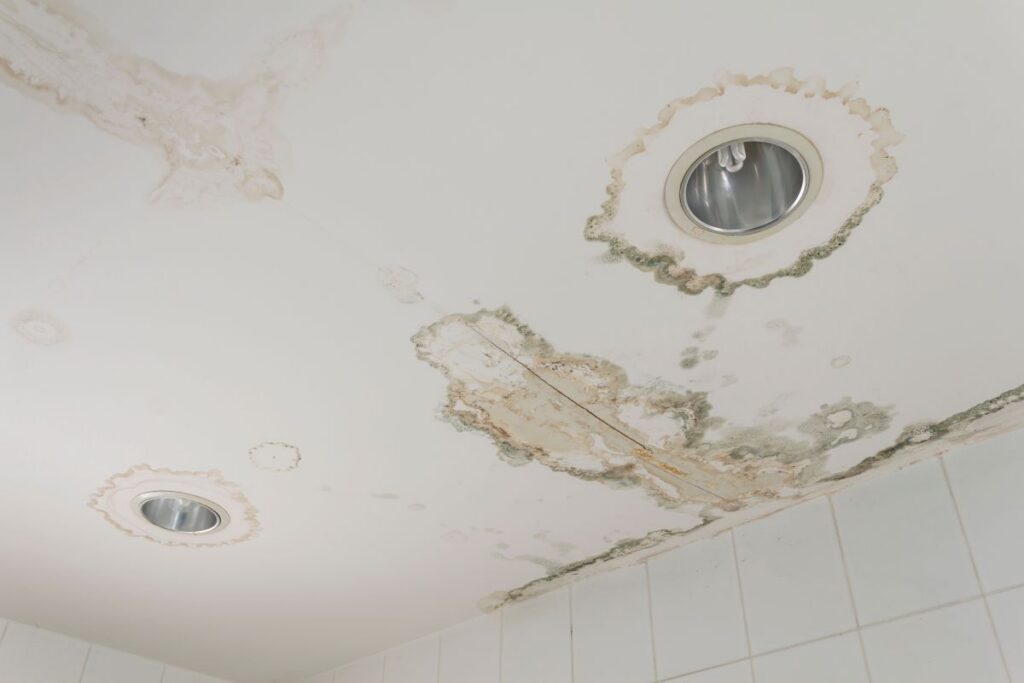
- Hours 24 to 48: Mold spores begin germinating in damp materials.
- Days 3 to 7: Visible mold colonies form; framing begins absorbing moisture deeply.
How Quickly Does Mold Grow on a Wet Ceiling?
Mold grows on a wet ceiling within 24 to 48 hours of moisture exposure, which makes the drying window extremely narrow. According to the U.S. Environmental Protection Agency, it is important to dry water damaged areas and items within 24 to 48 hours to prevent mold growth, and water leaks should be addressed immediately when they occur indoors. Once mold becomes established in drywall or insulation, professional remediation is typically required, with costs ranging from $1,500 to $9,000 depending on the affected area. Homeowners in Mason and surrounding areas should treat any visible ceiling leak as a 24 hour problem, not a “next weekend” problem.
- 24 to 48 hour window: EPA’s threshold for preventing mold growth after water damage.
- Porous materials: Drywall, insulation, and ceiling tiles often cannot be saved if saturated longer than 48 hours.
- Hidden colonies: Mold often grows behind the drywall before any visible sign appears below.
- Cost escalation: A $300 to $1,500 repair becomes a $5,000+ remediation once mold is established.
5 Emergency Ceiling Water Damage Repair Steps
The emergency repair process follows a strict order: stop the source, contain and document, extract and dry, treat for mold, and rebuild. Skipping or rearranging these steps almost always results in hidden damage that returns weeks or months later.
1. Stop the Active Water Source First
Stopping the active water source first is the single most important step because every minute of continued leaking expands the damaged area exponentially. If the leak is from a roof penetration, place a tarp over the affected roof section (or call a restoration company that offers emergency tarping) to stop water entry. If water is currently pooling in the ceiling and bulging the drywall, poke a small drainage hole with a screwdriver in the center of the bulge and catch the water with a 5 gallon bucket. This controlled release prevents the ceiling from collapsing unpredictably and damaging furniture or injuring occupants below.
- Roof tarp: Cover the leak source on the roof to stop active water entry.
- Controlled drainage hole: Release pooling water with a small puncture into a bucket.
- Shut off ceiling electrical: Turn off power to the affected room at the breaker if water is near fixtures.
- Document everything: Photograph the leak, the ceiling, and surrounding damage before any work begins.
2. Contain the Area and Document Damage
Containing the area and documenting damage simultaneously protects your possessions, prevents the damage from spreading, and locks in the evidence needed for an insurance claim. Remove furniture, electronics, rugs, and valuables from beneath the leak and from the surrounding 10 to 15 foot radius, then lay plastic sheeting on the floor and cover any furniture that cannot be moved. Before any cleanup begins, photograph and video every visible aspect of the damage from multiple angles, including wide shots that establish the room and close ups that show specific damage details. Most homeowners insurance policies in Mason and surrounding areas cover sudden and accidental water damage from roof leaks, but long term gradual leaks may not be covered, and poor documentation is one of the most common reasons claims get reduced.
- Clear a 10 to 15 foot radius: Remove anything that water could damage or that could block drying.
- Plastic sheeting on floors: Protects flooring from continued drips during cleanup.
- Wide and close photos plus video: Capture context, detail, and full scope.
- Call the insurer within 24 to 48 hours: Most policies require prompt notification and saved receipts.
3. Extract Water, Remove Wet Materials, and Dry the Cavity
Extracting water, removing wet materials, and drying the cavity is where professional equipment makes a significant difference. Standing water should be extracted with a wet/dry shop vacuum or commercial water extractor, not mopped, because mopping just spreads moisture deeper into the subfloor. The compromised section of ceiling drywall (typically a 2 foot radius around the leak) must be cut out and removed, along with any wet insulation in the cavity above. Once wet materials are out, industrial air movers and dehumidifiers should run continuously for 3 to 7 days, and a moisture meter must verify the framing reaches 12 to 16 percent moisture content before the cavity is closed back up. Skipping the drying step or relying on a single household fan almost guarantees that residual moisture will feed mold growth behind the new drywall within months.
- Wet vac, not mop: Mopping spreads moisture into subfloor and grout.
- Cut out 2 feet around the leak: Standard practice for saturated drywall removal.
- Discard wet insulation: Fiberglass batts and cellulose typically cannot be saved.
- Moisture meter verification: Framing must read 12 to 16 percent before closing the cavity.
4. Treat for Mold Before Rebuilding
Treating for mold before rebuilding addresses any spores that have already started to colonize even if visible mold is not yet present. Once the cavity is dry, all exposed framing and remaining drywall edges should be cleaned with an antimicrobial solution and allowed to dry completely. Any framing that shows visible mold growth, dark staining, or soft spots may need to be replaced rather than treated. For affected areas larger than 10 square feet, the EPA recommends professional remediation rather than DIY cleaning, because disturbing established mold colonies releases spores that can spread throughout the home through the HVAC system.
- Antimicrobial treatment: Applied to exposed framing and drywall edges.
- Replace, don’t treat, rotted wood: Soft or stained framing usually needs replacement.
- 10 square feet rule: EPA threshold for professional mold remediation.
- HVAC consideration: Disturbed mold colonies can spread through ductwork.
5. Rebuild the Ceiling and Verify Repairs
Rebuilding the ceiling and verifying repairs is the final stage and includes replacing insulation, installing new drywall, taping and mudding the joints, priming with a stain blocking primer, and repainting to match the existing ceiling. Stain blocking primer (such as oil based or shellac based products) is essential, because regular latex primer will allow old water stains to bleed through the new paint even after the drywall has been replaced. After the visible repair is complete, the homeowner or contractor should verify there is no continued leaking with a hose test on the roof and a follow up moisture check 2 to 4 weeks later to confirm no hidden moisture remains.
- Stain blocking primer: Required to prevent bleed through on the new paint.
- Insulation replacement: R value should match or exceed the original.
- Hose test: Confirms the roof repair stopped the original leak.
- 2 to 4 week follow up: Final moisture check ensures no hidden damage.
Signs Your Ceiling Has Hidden Water Damage
Hidden ceiling water damage is more common than visible damage, and recognizing the warning signs early often makes the difference between a minor repair and a major remediation. Many homeowners only call for help once visible staining appears, but other clues show up days or even weeks earlier.
Why Stains Appear Far From the Actual Leak
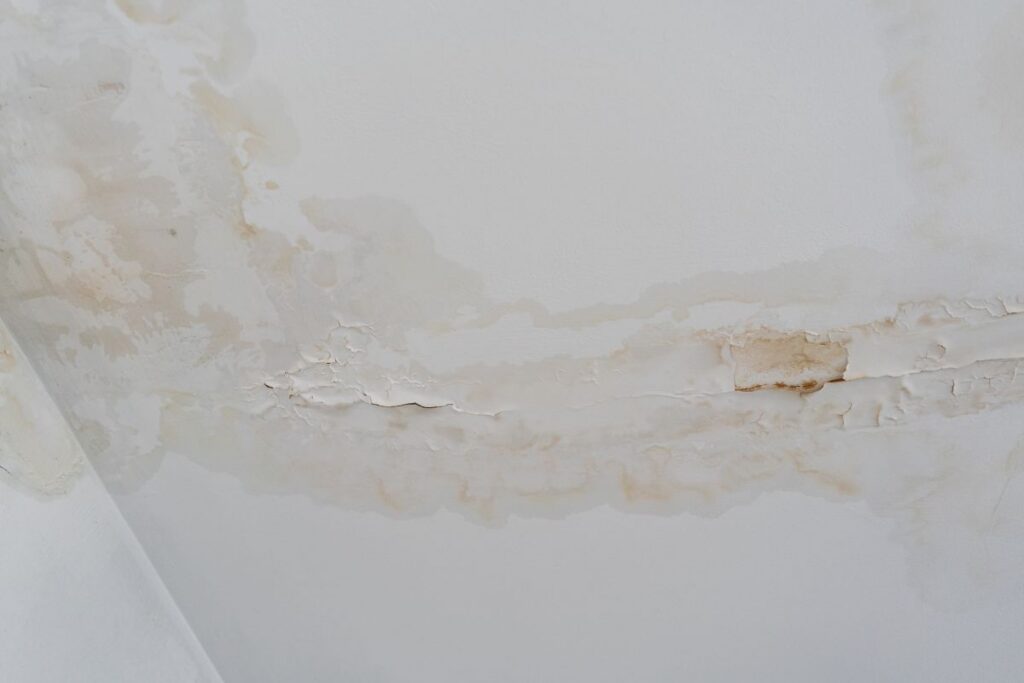
Stains appear far from the actual leak because water follows the path of least resistance through the roof and ceiling structure, often traveling 5 to 10 feet horizontally before it pools enough to soak through the drywall. Water entering a roof at a vent pipe may follow the rafter down to the wall plate, then run along the top of the wall before finally dripping onto the ceiling drywall in a different room. This is why simply patching the ceiling directly below a stain often fails to solve the actual problem, since the leak source is somewhere else entirely on the roof. A professional restoration contractor traces the water path from the visible stain back to the roof entry point rather than just cutting out the stained area.
- Water travels along framing: Rafters, joists, and top plates channel water sideways.
- Multiple stains from one leak: A single roof issue can produce stains in different rooms.
- Trace the path: Professionals work backward from stain to leak source.
- Patching alone fails: Without finding the source, the leak returns.
What Are the Warning Signs of Hidden Ceiling Damage?
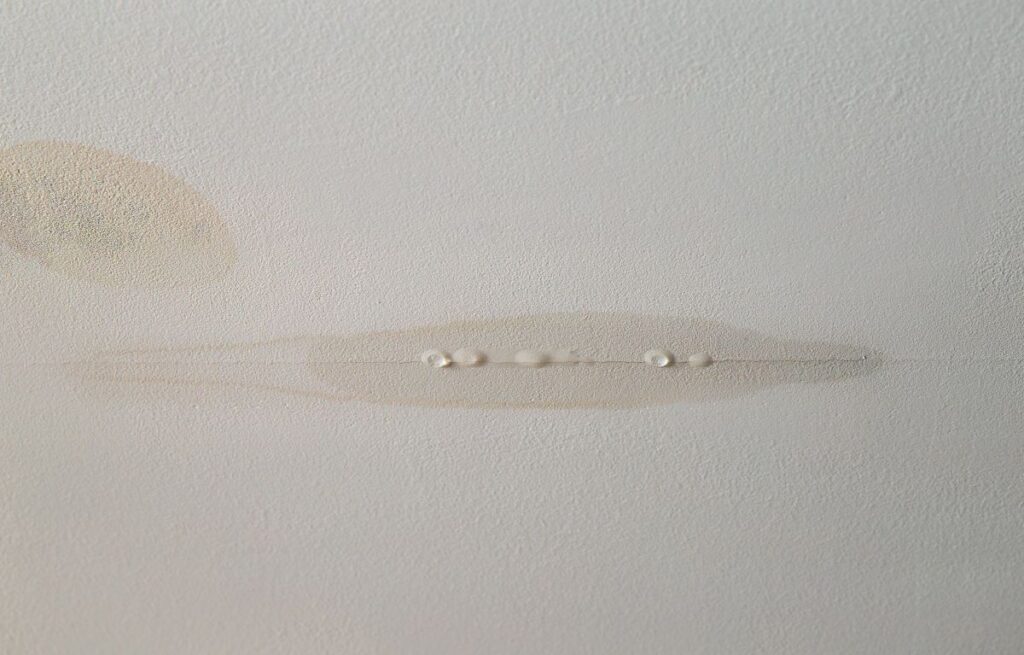
The warning signs of hidden ceiling damage include musty odors, peeling or bubbling paint, sagging drywall, brown or yellow stains, visible mold spots, and unexplained increases in indoor humidity. Less obvious signs include bowed ceiling drywall, popping or creaking sounds from the ceiling area, and water dripping from light fixtures or HVAC registers. In Mason and surrounding areas, where humid summers accelerate mold growth, even a small unexplained stain warrants immediate inspection. Homeowners should also check the attic after any heavy rain, looking for dark patches on the roof sheathing, wet insulation, or rusted nail tips, all of which signal active or recent moisture intrusion.
- Musty odor: Often the earliest sign of hidden moisture or mold.
- Bubbling or peeling paint: Indicates moisture is trapped behind the surface.
- Sagging drywall: A late stage warning that water is pooling in the cavity.
- Attic warning signs: Dark sheathing, wet insulation, or rusted nails after rain.
Frequently Asked Questions
How Much Does Ceiling Water Damage Repair Cost?
Ceiling water damage repair typically costs $500 to $2,500 for a small, localized repair, and $2,500 to $8,000 or more for repairs involving mold remediation, structural drying, or large affected areas in the Mason and surrounding areas market. Cost factors include the size of the damaged area, whether insulation needs replacement, whether mold is present, and ceiling height. Most homeowners insurance policies cover sudden ceiling water damage from a roof leak, though deductibles apply.
Does Homeowners Insurance Cover Ceiling Water Damage From a Roof Leak?
Homeowners insurance typically covers ceiling water damage from a sudden and accidental roof leak, such as one caused by wind damage, hail, or a fallen tree. Damage from long term gradual leaks, lack of maintenance, or pre-existing roof issues is generally not covered. Filing within 24 to 48 hours of discovery and documenting damage thoroughly significantly improves claim outcomes.
Can I Repair Ceiling Water Damage Myself?
Repairing ceiling water damage yourself is possible for small, fully dried, stain only damage where no mold is present and the leak source has been stopped. Anything involving sagging drywall, wet insulation, suspected mold, or a damaged area larger than 10 square feet should be handled by a professional restoration contractor. Improper DIY repairs are a leading cause of recurring water damage and hidden mold growth.
How Long Does Ceiling Water Damage Repair Take?
Ceiling water damage repair typically takes 3 to 7 days for the drying phase and 1 to 3 additional days for drywall replacement, priming, and painting. Larger projects involving mold remediation can extend the timeline to 2 to 4 weeks. The drying phase is the most time critical and cannot be safely shortened, as premature closure of the ceiling cavity is a leading cause of secondary mold growth.
Will a Water Stain Bleed Through New Paint?
A water stain will bleed through new latex paint without a stain blocking primer underneath. Oil based primers (like KILZ Original) and shellac based primers (like Zinsser BIN) are the only products reliable for permanently blocking water stains. Painting directly over a water stain with regular paint almost always results in the stain reappearing within days or weeks.
Should I Run a Dehumidifier After a Roof Leak?
Running a dehumidifier after a roof leak helps reduce ambient humidity in the affected room, but it is not a substitute for opening the ceiling cavity and drying the framing directly. A household dehumidifier may help with surface drying but cannot pull moisture from saturated drywall, insulation, or framing. Professional restoration contractors use commercial dehumidifiers paired with air movers for proper structural drying.
Why Mason Homeowners Trust Johnson Restoration for Emergency Ceiling Repairs
A roof leak that reaches your ceiling is not a problem that can wait for the weekend. Drying time, mold prevention, and a proper repair sequence all hinge on getting professional help inside the 24 to 48 hour window the EPA recommends. Johnson Restoration brings over a decade of industry experience to emergency water damage situations in Mason and surrounding areas, with workmanship warranties, financing options, and the equipment needed to dry, treat, and rebuild ceilings the right way the first time. If a roof leak has stained, sagged, or soaked your ceiling, contact Johnson Restoration today for a free estimate and let our team stop the damage before it spreads any further.