Just about everyone has had some kind of negative experience with insurance, whether it’s for health issues, having vehicles covered, or filing a home insurance claim. And though insurance coverage of all kinds is a necessity nowadays, it never seems like a simple process to make an insurance claim, especially when it comes to homeowners insurance for roof damage.
So, if you’re like millions of other Americans who don’t know how to file a roof insurance claim or even remotely deal with your insurance company when you need roofing services to restore your home, you’ve come to the right place.
If wind and hail damage have impacted your home and caused roof damage, don’t wait and let the situation worsen and wind up with even further damage down the line. Instead, take action and follow our 8 simple steps. Knowing precisely how to file a roof insurance claim gives you the power to start the process immediately and minimize loss. Follow our guide to make a roof damage claim with your insurance company, and keep your fingers crossed that they’ll cover the replacement cost.

Policy and Coverage Fundamentals
Before you learn the step-by-step process of how to file a roof insurance claim, you must first understand the financial backbone of your policy: the coverage fundamentals. Starting your claim without this essential knowledge is one of the most common and costly mistakes homeowners make.
Know Your Payout: RCV vs. ACV
One of the most critical steps in preparing to how file a roof insurance claim is reviewing whether your policy offers Replacement Cost Value (RCV) or Actual Cash Value (ACV) coverage. These two types determine the amount of money you will receive for damage:
- Actual Cash Value (ACV): An ACV policy provides a payout for the depreciated value of your roof at the time of the claim.
- Replacement Cost Value (RCV): An RCV policy covers the total cost required to replace your roof with a brand-new version of itself.
Damage Covered and Excluded
Not all roof damage is covered, which is vital information when determining how to file a roof insurance claim successfully. Homeowners insurance is designed to cover sudden or accidental damage caused by specific events, often called “perils”.
- Common Covered Perils include wind, fire, hail, lightning, falling objects, and fallen trees.
- Common Exclusions typically involve damage resulting from a lack of maintenance or neglect over time. This includes issues like damage from insects or rodents, rust, rot, and general wear and tear.
The Deductible Threshold
Before you formally begin filing a roof insurance claim, check your policy’s deductible. If the estimated repair cost barely exceeds your deductible (for instance, a $2,100 loss with a $2,000 deductible), it may be wise not to file. Every claim filed goes on your record for up to seven years. If the damage is minor, you risk raising your future premiums and potentially having a claim on your record for a minimal payout. Therefore, only pursue filing a roof insurance claim when the damage is substantial and the repair cost significantly surpasses your deductible.
How to File A Roof Insurance Claim in 8 Steps
These 8 steps will help you find out how to file a roof insurance claim process, making the process a little easier. Not to mention, it could very well increase the chance your insurance provider will cover the cost of repairs or replacement. Let’s dive in!
Step One: Assess the Damage
To start, you need to know exactly what you’re dealing with in terms of wind and hail damage after a storm. Many culprits could be behind your roof damage, such as:
- High winds
- Hail damage
- Heavy rains
- Blown debris
- A fallen tree branch
- A natural disaster
- Another severe weather event
Some issues are easily seen from the ground or inside your home, such as missing shingles, water stains, or a huge downed tree. However, other types of roof damage might be less obvious and require you to use a ladder in order to get up on your roof and take a look. This initial inspection is a crucial step in preparing the evidence needed for a successful claim. Understanding the extent of the damage yourself is the foundation for knowing how to file a roof insurance claim efficiently and effectively.
If that’s the case, grab a friend who can hold the ladder steady while you assess the damage from up there so you don’t fall and hurt yourself like many other homeowners do every year, landing them in the emergency department.
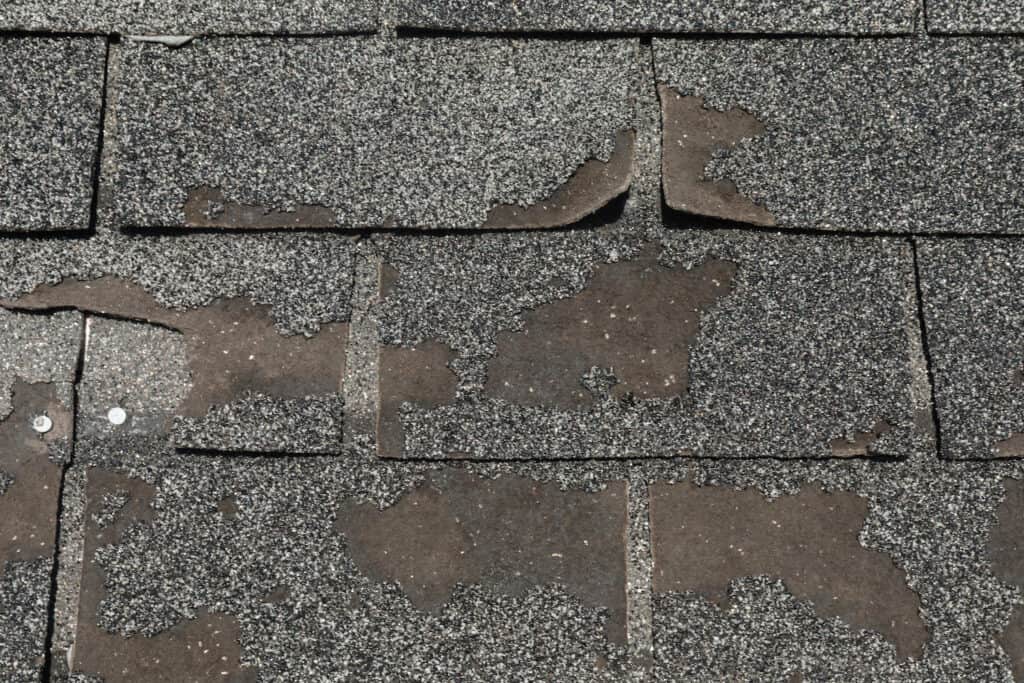
Once you’ve safely climbed your way up to the roof’s edge, you can look for common signs of damage and document them for your roof claim. Some examples of roof damage to keep an eye out for include:
- Missing shingles
- Shingle granule loss (in gutters)
- Curled, cracked, or dented shingles
- Fallen debris on your roof
- Damaged gutters and downspouts
- Internal water damage (leaks in attic, stains on walls and ceilings, rotting floorboards, etc.)
While you’ll likely have a hard time missing something like a major water stain or leak inside your home, sometimes it’s hard to tell when or where damage occurs with an untrained eye. That’s why it’s crucial to schedule a professional roof inspection for your home as well, which we’ll discuss further in step five. Getting a professional assessment is the foundation for completing the process, as it is the first and most critical step for knowing how to file a roof insurance claim correctly.

Step Two: Document Every Detail
Whether your home is partially damaged by a few balls of hail or wind damage rips your entire roof off its frame, it’s still important to document every aspect of your storm damage. This is so that homeowners have some backup or proof when learning how to file a roof insurance claim. Meticulous documentation is the single most powerful asset you possess during the claim process.
It’s also crucial to have proper documentation of what your home and roof looked like prior to the damage occurring so your insurance company has a solid frame of reference for the extent of the storm damage. Think of it as a sort of “before and after” comparison that you might see on HGTV, except now you have to file a claim— not find your lottery dream home.
The best way to document your roof damage is simply by shooting some pictures and videos with your smartphone or camera. You can also provide detailed records of all of the regular maintenance you’ve done (or should have done) on your roof in recent years to show that you’re taking good care of your roof, and these roof issues really aren’t your fault. This meticulous documentation is the absolute foundation for successfully navigating the claims process and knowing how to file a roof insurance claim with confidence.
Step Three: Review Your Homeowners Insurance Policy
Now that you know exactly where your roof was damaged and have all the issues documented, you can determine whether or not your insurance company covers what you’ve found. The claims process is often lengthy and confusing, so you want to know exactly what your policy covers before you file a claim so you don’t waste any of your valuable time.
Typically, these types of roof damage are covered by most insurers:
- Hail
- Wind
- Fire
- Lightning
- Falling objects/debris
- “Acts of God” (events outside of human control)
While insurance covers a range of damage caused by severe weather, some situations are not covered (or require a separate, specific insurance policy), such as:
- Improper maintenance and upkeep
- Intentional or accidental damage by the homeowner
- Roofing systems over 20 years old
- Floods or earthquakes (separate insurance)
Before starting any paperwork, mastering these policy exclusions is crucial to successfully submitting your documentation and finalizing how to file a roof insurance claim.

Step Four: Contact Your Insurance Company
Before making the roof claim, feel free to contact your insurance company to explain your current situation and learn more about their specific procedures or requirements.
This can help you avoid any wasted time when you file a claim as well, especially if you’re only partially covered for roof repairs or if you’re only covered for the actual cash value (ACV) of your roof repair. Understanding your coverage limits is a necessary prerequisite to knowing how to file a roof insurance claim efficiently. States primarily offer two types of roofing coverage, so ask your insurance agent for clarification on which type you have:
- Repair coverage has a higher deductible and higher premiums, but they provide the best protection to ensure you’ll receive full reimbursement for a new roof when an eligible event takes place.
- Actual cash value (ACV) coverage will account for your roof’s age and your home’s depreciated value prior to determining just how much of the total cost is paid out.
Step Five: Have Your Roof Inspected & Get an Estimate
Both you and your insurance provider will want to have your roof inspected prior to installing your new roof. Theirs will be by a public adjuster who assesses the roof damage to determine the final costs, while yours can be through a private roofing company or contractor in your area to find an accurate quote.
IIt’s valuable to get various estimates from multiple roofing contractors and compare them to decide who’s best suited to take on your project. Obtaining professional quotes is a crucial element in maximizing your payout when considering how to file a roof insurance claim. When picking your roofing contractor, they should possess some very important qualities:
- Experience – Look for a roofing contractor with years of experience under their belt.
- Reputation – Ask around town or among your neighbors and friends to find out who’s currently considered the best local roofing contractor.
- Ratings – You’ll also want to check out reviews online and ratings with places like the Better Business Bureau (BBB).
- Licenses – Ensure your roofing contractor is licensed to work in your state and is insured and bonded, so you have backup if they fail to follow through.
- Transparency – Most contractors will offer a free written estimate, so find someone who provides honest and transparent pricing upfront.
- Punctuality – Playing phone tag back and forth with anyone can be annoying, especially with your roofing contractor. When it comes to home safety, there’s no time to waste, so you want a roofer who’s prompt, punctual, and professional.
- Respect – Many women and first-time home buyers can attest to being treated with little respect by condescending contractors who think they can be pushy or shady. Your specialist should be a professional and respectful roofing company that provides all the information you need to file a roof claim and fix your roof quickly.

Step Six: File a Roof Claim
With all your evidence gathered and a roofing estimate in hand, it’s time to file a roof claim using the form provided by your insurance company. Include every piece of information you possibly can. As one of the final steps, this is important to formalize the entire process of how to file a roof insurance claim.
And in extreme situations where your family gets stuck in a hotel until help arrives, always remember to submit the receipts for your hotel stays and damaged furniture at home too.
Step Seven: Meet With an Insurance Adjuster
We know it can be annoying, but now you’ll need to invite an insurance adjuster over to your property. The adjuster inspects your roof to assess the roof damage and verify it for your insurance company. This visit is the formal validation step of the entire process. Don’t be afraid to ask your roofer to come by for the inspection, too, so they can use their professional opinion to advocate for you and confirm the specifics of how to file a roof insurance claim correctly.
Step Eight: Schedule Your Roofing Services After Claim Approval
Once your insurance company approves your claim, it’s time to schedule your roof repair. Just be aware that claim processing times can be lengthy, as your insurance agent is likely working through several claims at a time, so you might need to tarp over your roof until the work can start.
Expert Roofing Services (And Insurance Claims Assistance) When You Need Them Most
Do you need help filing a homeowners insurance claim after storm damage causes issues with your roof? At Johnson Restoration, we’re here to help walk you through everything from the procedural nuances of how to file a roof insurance claim to actually getting your roof replaced. You can rely on our dedicated team to ensure you’re informed about and prepared for every aspect of a roof insurance claim.
Contact us today to learn more about how we can help you file a roof claim and get your home back to perfect working condition quickly.


