
A step flashing roof is one of the most important systems for keeping water out of vulnerable roof intersections. Step flashing is a series of metal pieces installed where the roof meets a vertical surface, such as a chimney, dormer, or wall, to direct water away from seams and into the gutter system. For property owners in Lebanon and surrounding areas, understanding how step flashing works can help prevent leaks, mold growth, and costly structural damage.
- Leak protection: Proper step flashing channels water off the roof safely.
- Durability: Long-lasting materials ensure protection through harsh weather.
- Essential maintenance: Routine inspections help extend the life of your entire roofing system.
Knowing how step flashing functions and when to repair or replace it can save you significant time and money over the years.
What Is Step Flashing?
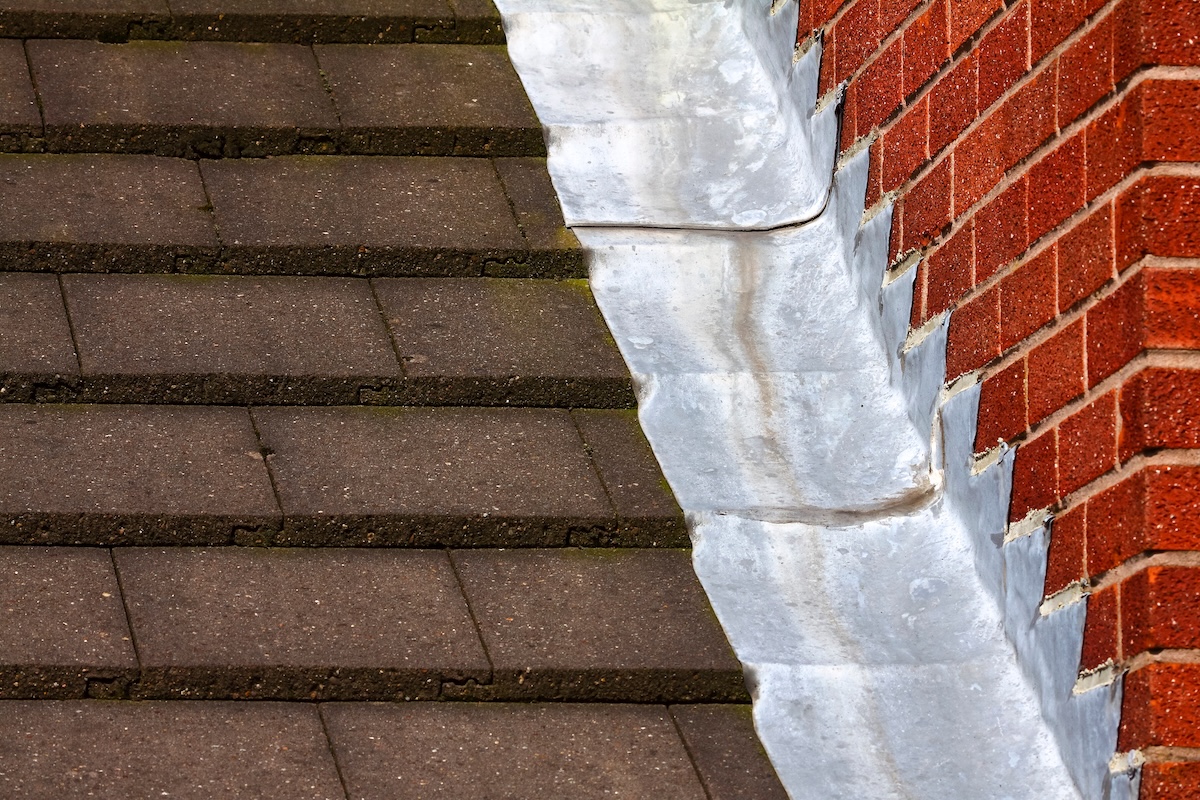
Step flashing consists of small L-shaped metal pieces installed between each layer of shingles along a vertical intersection. The “step” pattern allows water to flow down and over each piece, keeping it from seeping behind siding or into the roof decking.
Unlike continuous flashing, which is one solid strip of metal, step flashing overlaps in layers, creating a watertight seal that adapts to the roof’s slope. This design is especially useful for areas where two materials—like asphalt shingles and siding—meet at an angle.
Step flashing is usually made from aluminum, galvanized steel, or copper. Each material offers a different level of durability and weather resistance depending on your home’s design and local climate.

Why Step Flashing Is Critical for Roof Longevity
Without proper flashing, even the best roofing materials can fail prematurely. Step flashing prevents water infiltration at joints that are otherwise difficult to seal with shingles alone.
When installed correctly, it channels water away from the walls and directs it toward gutters. This not only protects your shingles and underlayment but also prevents damage to your siding and foundation.
Homeowners in Ohio’s variable weather conditions benefit most from durable flashing because it helps prevent ice dams, wind-driven rain, and debris buildup—all of which can lead to interior leaks and insulation damage.
Common Step Flashing Problems
Over time, step flashing can deteriorate due to exposure, poor installation, or lack of maintenance. Recognizing the early signs of trouble can help you avoid major repairs later on.
- Corrosion: Rust and oxidation weaken metal flashing and cause leaks.
- Loose or missing pieces: Shifting or missing sections allow water to penetrate the structure.
- Improper overlap: Incorrect installation can create gaps that compromise waterproofing.
- Sealant failure: Caulk or adhesive used around flashing can dry out or crack.
- Pest or debris buildup: Leaves, twigs, or animals can block drainage and trap moisture.
Regular inspections are the best way to ensure your flashing system continues to perform as intended.
6 Steps for Step Flashing Roof Installation
Installing step flashing correctly requires precision and an understanding of roof structure. While this process may look simple, each layer must be installed in the correct order for the system to remain watertight.
Before starting, contractors should assess the roof’s slope and condition, as well as verify that the adjacent siding or chimney structure is ready for proper sealing.
1. Prepare the Roof Surface
The first step is to remove old shingles and flashing. The area must be clean and free from debris or damaged wood. Any compromised underlayment should be replaced to provide a stable base for the new flashing.
- Tip: Always check for hidden rot or water damage under old materials before installing new ones.
2. Install the Underlayment
A high-quality roofing underlayment provides an additional layer of moisture protection beneath the flashing. It should be installed flat and secured properly before laying shingles or flashing.
- Note: Ice and water shield membranes are recommended in areas prone to heavy rain or snow.
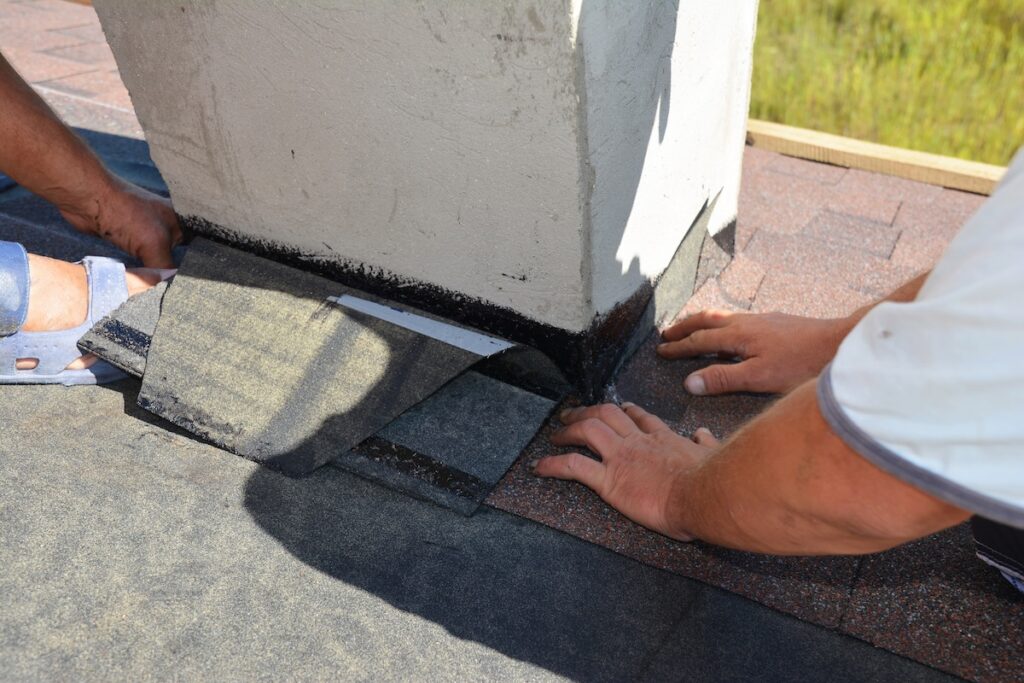
3. Position the First Piece of Step Flashing
The first piece of step flashing is placed over the starter shingle and against the wall. It should extend onto the roof deck about four inches and up the wall about two inches.
- Important: Always align the lower edge of the flashing with the bottom of the shingle to maintain proper overlap.
4. Nail and Secure Each Piece
Each piece of flashing is nailed through the roof deck—not the wall—so it can move slightly with temperature changes without breaking the seal. The next shingle is then installed over the flashing, and another piece of flashing is placed on top of that shingle, overlapping the previous one.
- Best practice: Maintain a 2-inch overlap between each flashing piece to ensure full coverage.
5. Continue the Step Pattern
Continue alternating shingles and flashing up the roof line, maintaining consistent overlap. Each piece should “step” higher up the wall, forming a continuous barrier that directs water downward.
- Reminder: The final piece should extend past the top shingle and tuck behind siding or counter flashing.
6. Seal and Inspect the System
Once all flashing pieces are in place, seal the upper edge with a waterproof roofing sealant or counter flashing strip. A final inspection ensures all sections are secure and watertight.
- Final check: Spray the area lightly with water to confirm proper drainage before finishing.
When done properly, step flashing will remain effective for decades, even through Ohio’s heaviest rainfall.

How To Maintain Step Flashing
Like any roofing component, step flashing requires occasional maintenance to keep it performing at its best. Regular attention prevents minor issues from developing into costly leaks.
- Inspect annually: Check flashing at chimneys, dormers, and wall intersections each spring and fall.
- Clean debris: Remove leaves and twigs that trap water and encourage rust.
- Touch up sealant: Replace cracked or peeling caulk as needed.
- Check shingle overlap: Ensure shingles still cover the top edge of each flashing piece.
- Replace damaged sections: Don’t ignore corrosion or bending; small repairs prevent larger ones later.
Consistent maintenance helps preserve both the flashing and the entire roofing system.
Step Flashing Materials: Pros and Cons
Choosing the right flashing material depends on your roof design, budget, and local climate. Each option offers unique strengths and considerations.
- Aluminum: Lightweight and rust-resistant but can corrode when in contact with concrete or mortar.
- Galvanized steel: Affordable and durable, though it requires proper coating to prevent rust.
- Copper: Long-lasting and visually appealing but more expensive.
- Lead-coated copper: Combines durability with corrosion resistance, ideal for high-end projects.
- Plastic or PVC: Used in limited applications but less durable over time.
For most properties in Ohio, galvanized steel or aluminum step flashing provides the best balance of longevity and cost-efficiency.
When To Replace Step Flashing
Step flashing should last as long as the roofing system itself, but there are times when replacement becomes necessary.
- Roof replacement: Always install new flashing during a full roof replacement to maintain warranty coverage.
- Visible damage: Rust, cracks, or missing sections require immediate repair.
- Persistent leaks: Ongoing water intrusion around walls or chimneys indicates flashing failure.
- Storm damage: High winds can dislodge flashing or lift shingles around it.
If you notice these signs, it’s best to have a professional roofing contractor evaluate the damage and provide the proper solution.
Protect Your Roof With Johnson Restoration
At Johnson Restoration, we understand how essential step flashing is to the overall integrity of your roofing system. Our expert team helps property owners in Lebanon and surrounding areas identify, repair, and replace flashing to prevent leaks and prolong the life of their roofs.
As a trusted local roofing company, we bring quality craftsmanship and decades of experience to every project. Whether you need a full roof replacement, flashing repair, or storm damage inspection, Johnson Restoration provides reliable solutions and peace of mind you can count on. Contact us today to schedule a professional inspection and keep your roof protected year-round.