
One of the unsung heroes of your roof’s structure is the flashing. Roof flashing ensures that water doesn’t seep into vulnerable areas of your roof, such as:
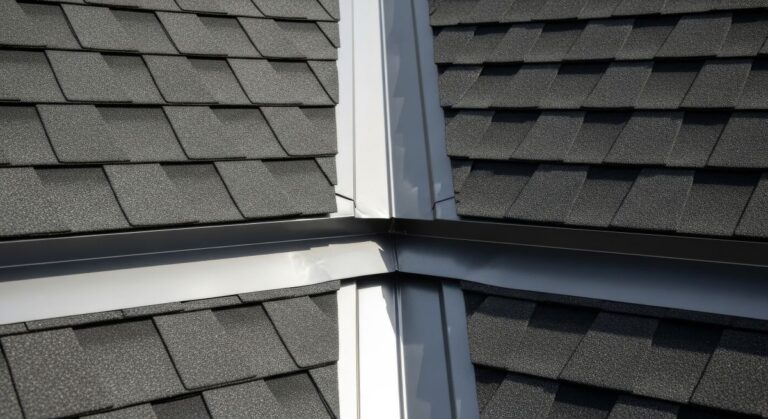
- Valleys
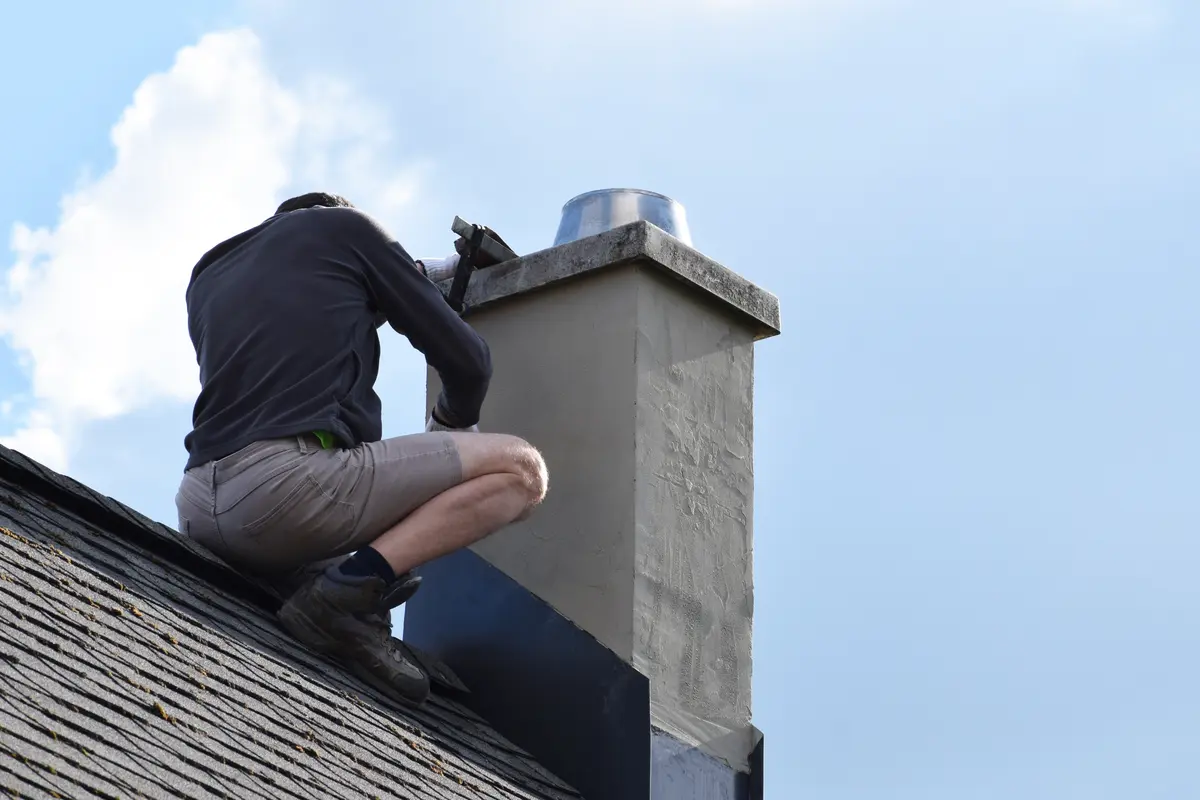
- Chimneys
- Skylights
When it gets damaged or worn down, trouble isn’t far behind. If you’ve been noticing leaks, water stains, or other roof-related issues, it might be time to examine your flashing. Don’t worry—whether you’re considering DIY roof flashing repair or thinking of hiring a professional like Johnson Restoration, we’ve got everything you need to know about roof flashing repair.
What Is Roof Flashing?
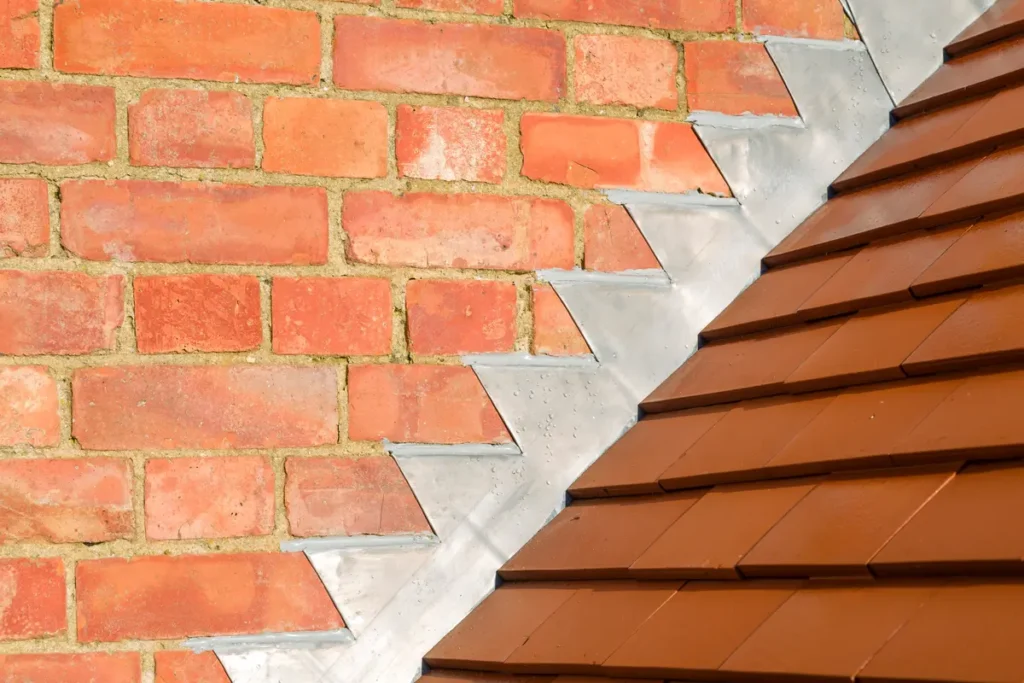
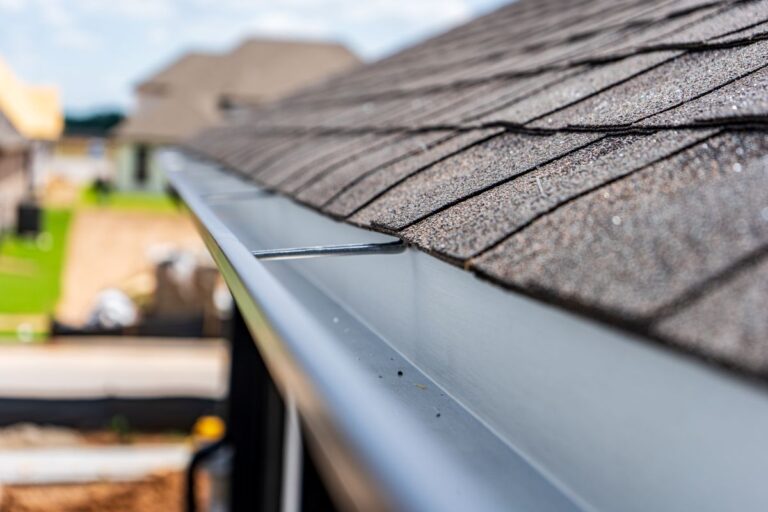
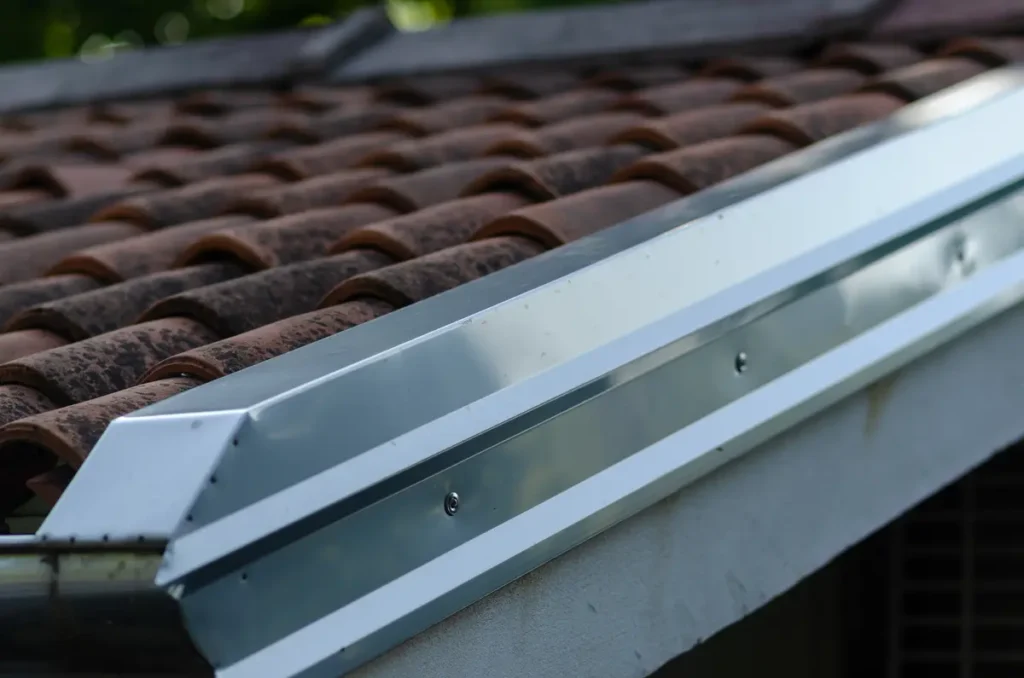
Roof flashing is a strip of metal or other durable material installed in critical areas on your roof to prevent water from entering the structure. It’s typically found where two roof parts meet, such as around chimneys, vents, skylights, and in roof valleys. Common materials for roof flashing include:
- Aluminum – Lightweight and rust-resistant, aluminum is a popular choice.
- Copper – Highly durable with a distinctive aesthetic, copper is often used on high-end homes.
- Galvanized Steel – A cost-effective and sturdy option for most homes.
- Rubber or Plastic – While more affordable, these materials are less durable over time.
Flashing acts as a waterproof barrier that safeguards the most vulnerable areas of your roof.
Why Is Roof Flashing Important?
Flashing isn’t just a nice-to-have feature—it’s essential. Without it, water can easily seep into areas where the roof changes direction or intersects with other structures. Over time, this water infiltration can lead to:
- Leaks – The most obvious issue is water dripping into your attic or ceiling.
- Structural Damage – Moisture buildup can weaken wooden roof supports and other structural elements.
- Mold Growth – Damp conditions in the attic can lead to unhealthy mold, which can spread quickly and affect indoor air quality.
- High Repair Costs – Ignoring flashing issues often results in more costly damage down the line.
For these reasons, keeping your roof flashing in good condition is crucial for protecting your home.
Signs Your Roof Flashing Needs Repair
How can you tell when it’s time for a roof flashing repair? Keep your eyes open for these telltale signs:
- Leaks or Dripping Water – Water inside your home, especially near chimneys or skylights, is a clear indicator something is wrong.
- Water Stains – Look for brown or yellow stains on your ceiling or interior walls.
- Damaged or Missing Flashing – If you notice bent, rusted, cracked, or missing flashing pieces, repairs are needed.
- Peeling Paint or Mold – Moist areas on your exterior walls or ceilings are red flags.
- Loose Shingles – Shingles that pop up around flashing areas may signal water intrusion.
If you spot any of these issues, it’s time to address the problem before it worsens.
What Causes Flashing Damage?
Flashing is built to last, but several factors can cause it to wear down or fail over time:
- Weather Conditions – Heavy rains, snowstorms, and strong winds can damage flashing or loosen its seals.
- Poor Installation – Incorrectly installed flashing is more likely to fail under pressure.
- Age and Wear – Like any material, flashing deteriorates over time due to exposure to the elements.
- Physical Damage – Falling debris, like branches, can damage flashing.
- Shifting Roof Components – Natural settling of your home or roof movement from temperature changes can affect flashing alignment.
Routine roof maintenance can spot these issues early and save you the hassle of significant repairs.
How to Repair Roof Flashing: A 7 Step DIY Guide
Repairing roof flashing yourself can save time and money if done correctly. Follow these detailed steps to fix damaged flashing and protect your home from leaks.
1. Inspect Your Roof for Damage
Start by thoroughly examining your roof to locate the damaged flashing. Look for signs like leaks, rust, cracks, or areas where the flashing has pulled away from the roof. Be sure to also check for water stains or damp spots inside your attic as they can indicate damaged flashing.
- Working on a roof can be dangerous, so use proper safety equipment and precautions.
- This approach is best for small fixes or straightforward patching.
2. Remove Surrounding Materials
Once you’ve identified the problem area, carefully remove any shingles, tiles, or other roofing materials that cover or overlap the damaged flashing. Use a pry bar or a similar tool to lift the materials gently, ensuring you don’t cause further damage.
3. Remove the Old Flashing and Clean the Area
Using a pry bar, lift and remove the old flashing. Be cautious to avoid damaging the underlying roof structure. Once the flashing is removed, clean the area thoroughly. Scrape away old sealant, debris, or residue to ensure a smooth surface for the repair.
4. Cut New Flashing to Fit
Measure the area where the flashing will be replaced and cut a new piece of flashing to the correct size. Use tin snips or a similar cutting tool to achieve precise measurements. Ensure the new piece is slightly larger than the damaged area to provide adequate coverage.
- Safety – Professionals are trained to work safely at heights and have the equipment needed to handle hazardous situations.
- Expertise – Roofing contractors are experienced in identifying flashing issues and providing long-lasting repairs.
- Comprehensive Service – Pros can give your entire roof a once-over, spotting and addressing other potential issues.
- Time and Convenience – Roof repairs can take time, and hiring an expert frees you to focus on other tasks.
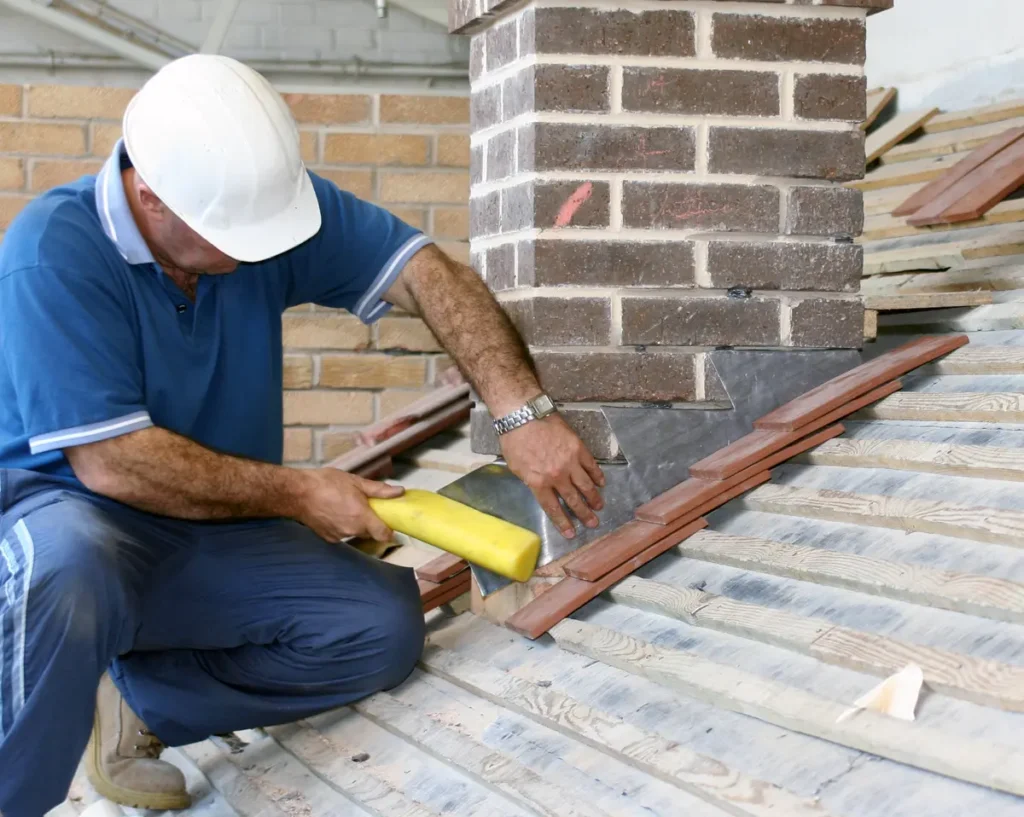
5. Install the New Flashing
Position the new flashing over the cleaned area. Secure it in place using roofing nails or a strong adhesive designed for roofing repairs. Be sure the flashing lies flat against the roof to prevent gaps where water could seep through.
6. Seal the Edges
Apply roofing cement along the edges of the new flashing to create a watertight seal. Use a caulking gun or putty knife to spread the cement evenly. Pay special attention to any seams or overlaps to ensure complete protection from water intrusion.
7. Replace the Overlapping Materials
Once the flashing is securely in place and sealed, reinstall the shingles, tiles, or other roofing materials you removed earlier. Nail them back into position and seal any exposed nails with roofing cement for added waterproofing.
Why You Should Consider Hiring a Professional
For most homeowners, hiring a professional roofing contractor like Johnson Restoration is the smartest move. Here’s why:
- Safety – Professionals are trained to work safely at heights and have the equipment needed to handle hazardous situations.
- Expertise – Roofing contractors are experienced in identifying flashing issues and providing long-lasting repairs.
- Comprehensive Service – Pros can give your entire roof a once-over, spotting and addressing other potential issues.
- Time and Convenience – Roof repairs can take time, and hiring an expert frees you to focus on other tasks.
While hiring a professional involves upfront costs, it often saves money in the long run by preventing future problems.
The Process of Professional Roof Flashing Repair
When you contact Johnson Restoration for roof flashing repair, here’s what you can expect:
- Initial Inspection – A roofing expert will perform a comprehensive inspection to assess the extent of the damage.
- Repair Plan – The contractor will explain the repair options, materials, and costs, ensuring you’re clear on the steps ahead.
- Material Removal – Damaged flashing will be carefully removed without harming the surrounding roofing materials.
- Flashing Replacement – New flashing is cut to precise measurements and installed securely.
- Seal and Finish – The edges are sealed with high-quality roofing cement and covered with shingles or other materials for a seamless fit.
- Final Inspection – Your contractor will double-check the repair to ensure it’s completed to the highest standard.
A professional repair ensures your flashing is restored to peak performance, safeguarding your home from leaks and water damage.
How to Prevent Future Flashing Issues
Once your flashing is repaired or replaced, these tips can help it last longer:
- Schedule Regular Roof Inspections – Have a trusted roofing contractor inspect your roof annually or after severe weather to catch problems early.
- Keep Your Roof Clear of Debris – Trim overhanging branches and remove leaves to prevent physical damage.
- Ensure Proper Installation – Whether you’re installing new flashing or a new roof, always work with certified professionals to ensure quality.
- Monitor Your Home – Pay attention to signs of leaks, stains, or other damage, and address them promptly.
Regular maintenance goes a long way in keeping your roof in top shape.
Let us Replace Roof Flashing For You
Roof flashing might not be the most glamorous part of your home, but it’s undeniably one of the most important. Whether you’re noticing water staining your walls, spotting loose shingles, or just performing routine maintenance, taking care of your roof flashing is a must.
If you’re unsure where to start or would rather leave the hard work to the experts, Johnson Restoration is here to help. We combine expertise, top-rated materials, and a customer-first approach to ensure your roof is in the best condition possible.Contact Johnson Restoration today to schedule your roof flashing repair and enjoy the peace of mind that comes with knowing your home is fully protected.