
How to install gutter guards is essential knowledge for maintaining the health and integrity of your home. If you’ve wondered how to install gutter guards efficiently, you’ve come to the right place. By proactively protecting your gutters, you can avoid blockages, water damage, and potentially costly repairs.
By proactively protecting your gutters with a quality system (such as mesh-screen or micro-mesh guards), you can significantly reduce the time and effort spent on maintenance. Gutter guards save you time and money by virtually eliminating major clogs, which are the leading cause of costly problems like water damage to your roof, siding, and foundation.
We’ll walk you through everything, from choosing the right type to a complete, step-by-step guide on how to install gutter guards.
Key Takeaways
- Objective: How to install gutter guards is a crucial question for preventing clogs, water overflow, and subsequent damage to your home’s roof and foundation.
- Types of Guards: Options include Mesh (durable screen), Solid Surface (directs water via curves), Reverse Curve (uses surface tension), Brush, and Foam (inexpensive but requires more upkeep).
- 7-Step Process: The core method requires: cleaning the existing gutters, accurately measuring, attaching the guards securely (using screws/clips), checking the slope alignment, and testing the system with water.
- Preparation: Before starting, prioritize safety (stable ladder, gear) and thoroughly clean the gutters of all debris, dirt, and sediment.
- Professional vs. DIY: While how to install gutter guards is a common DIY task, professional expertise ensures flawless execution, maximum long-term durability, and eliminates safety risks associated with heights.
What Are Gutter Guards
Gutter guards, often referred to as gutter screens or leaf guards, are specially designed devices that prevent leaves, twigs, and debris from clogging your gutters. While they block unwanted materials, they still allow rainwater to flow freely into your drainage system. Understanding how to install gutter guards correctly is essential to securing a tight seal and ensuring the system performs as designed.
Benefits of Gutter Guards
- Reduces Regular Cleaning: Say goodbye to frequent and labor-intensive cleanups. Gutter guards minimize debris accumulation, saving your time and effort.
- Prevents Home Damage: By avoiding clogs and overflow, you reduce risks of mold, foundation cracks, and water pooling near your home.
- Improves Gutter Longevity: Protection from external debris means your gutters stay in better shape for longer.
Whether you’re considering professional installation or looking for DIY solutions, understanding the basics of how to install gutter guards will give you confidence in your next steps.
Types of Gutter Guards
Before installation, it’s crucial to select the right type of gutter guard for your home. Understanding the features and benefits of each material is key to successfully completing your project. Here are five common options to consider before deciding how to install gutter guards:
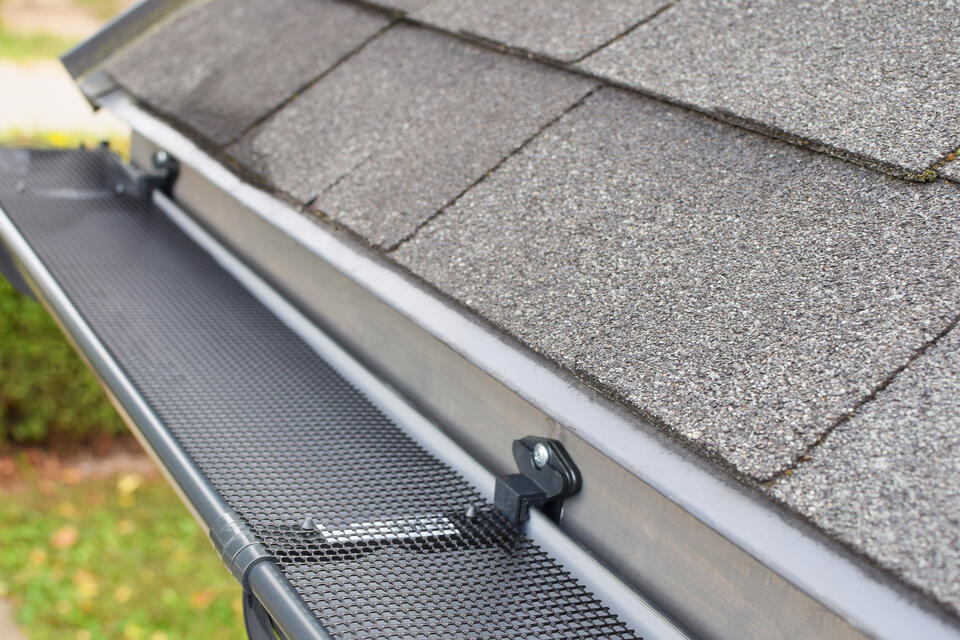
Mesh Gutter Guards
Mesh guards feature a perforated or fine screen that blocks debris but allows water drainage. Ideal for most environments, these are durable and efficient.
Solid Surface Gutter Guards
These use a smooth, curved design to direct water into your gutters while letting debris slide away. They’re highly effective in areas with heavy rainfall.
Reverse Curve Gutter Guards
Using principles of surface tension, the water follows the curve into the gutters, while leaves and debris fall over the edge. These work exceptionally well in areas with lots of fallen foliage.
Brush Gutter Guards
Essentially bristled brushes placed inside the gutters, these guards trap leaves and debris while ensuring water flow. They are an easy DIY option but may require frequent cleaning.
Foam Gutter Guards
Foam guards are inserted into the gutter itself, blocking debris on the surface while allowing water to seep through. They are inexpensive but may need more regular replacements.
Understanding the pros and cons of each type will ensure you choose a solution that suits both your property’s needs and your budget. This crucial decision directly impacts the planning and execution of how to install gutter guards effectively.
How To Install Gutter Guards in 7 Steps
Proper gutter installation is key to getting the full benefits, and the guards are an essential part of it. Follow this seven-step guide to complete your DIY project like a pro. This tutorial provides the essential knowledge on how to install gutter guards effectively and safely.
Step 1: Safety First
Whether you are wondering how to install gutter guards or are involved in another roofing project, safety should always come first.
- Positioning the Ladder: Ensure your ladder is placed on a stable, flat surface to prevent wobbling or tipping. Avoid setting it up on uneven ground or slippery surfaces. For added safety, use a ladder stabilizer if you have one, as it is one of the essential tools for roofing projects.
- Protective Gear: Wear durable gloves to protect your hands from sharp edges, debris, and dirt. Goggles are essential to shield your eyes from flying dust, twigs, or any unexpected debris while cleaning.
- Extra Support: If possible, have a friend or family member hold the base of the ladder to provide additional stability. This is especially important if you’re working at significant heights.
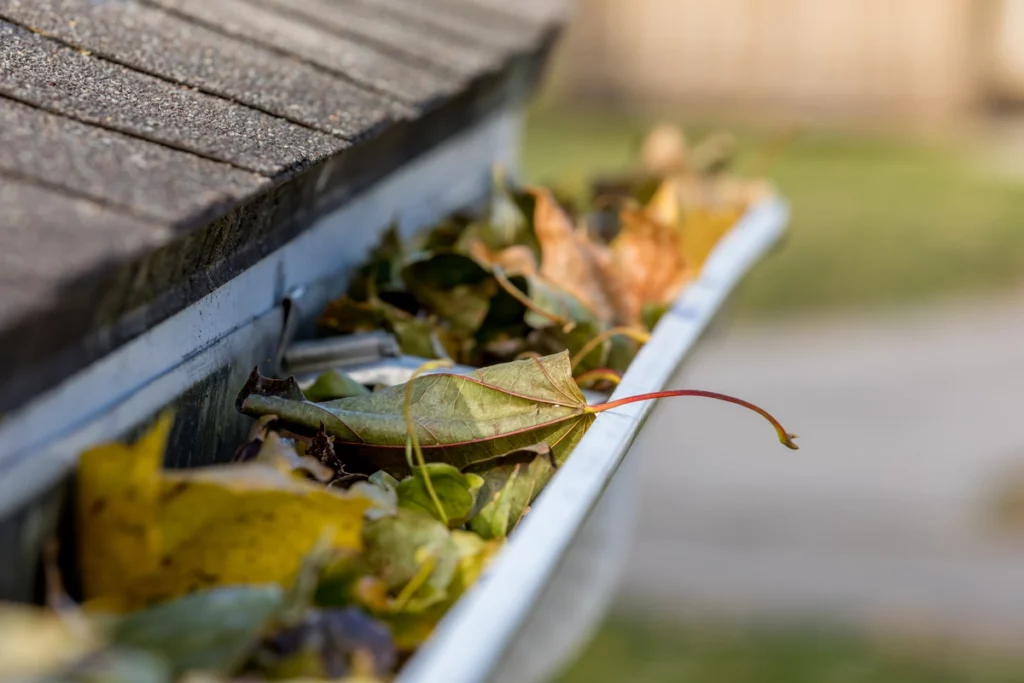
Step 2: Clean Your Gutters
Proper cleaning is crucial for a successful gutter guard installation.
- Debris Removal: Start by removing all visible debris, such as leaves, twigs, and dirt. You can use a trowel, garden scoop, or even your hands—just make sure you’re wearing gloves to protect against sharp objects.
- Rinse Thoroughly: Once the larger debris is cleared, use a hose to flush out finer particles like dirt or sand. A high-pressure nozzle can help dislodge stubborn residue stuck to the gutter walls.
- Check the Downspouts: Run water through them to ensure they aren’t clogged. Clear any blockages with a plumbing snake if needed. Properly cleaned gutters ensure your guards fit snugly and work effectively, which is the foundational step for knowing how to install gutter guards properly.
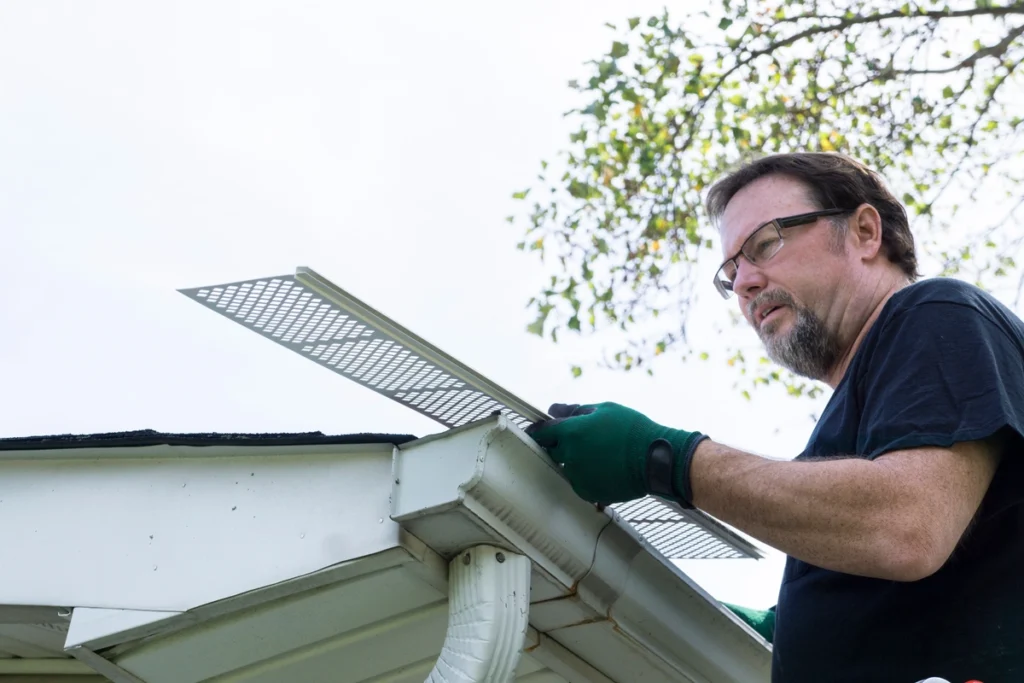
Step 3: Measure Your Gutters
Accurate measurements are key to ensuring you have the right amount of material. This vital preparation step guarantees you buy the correct quantity before you begin the process of how to install gutter guards.
- Measuring Length: Use a tape measure to calculate the total length of your gutters. Note down the measurements for each section to avoid running short on material mid-installation.
- Account for Corners: If your gutters turn corners, measure these areas carefully and add a little extra guard material to account for any overlaps.
- Cutting to Size: Once you’ve measured, cut the gutter guards to size using tin snips or heavy-duty scissors. Double-check the measurements before cutting to avoid wasting material.
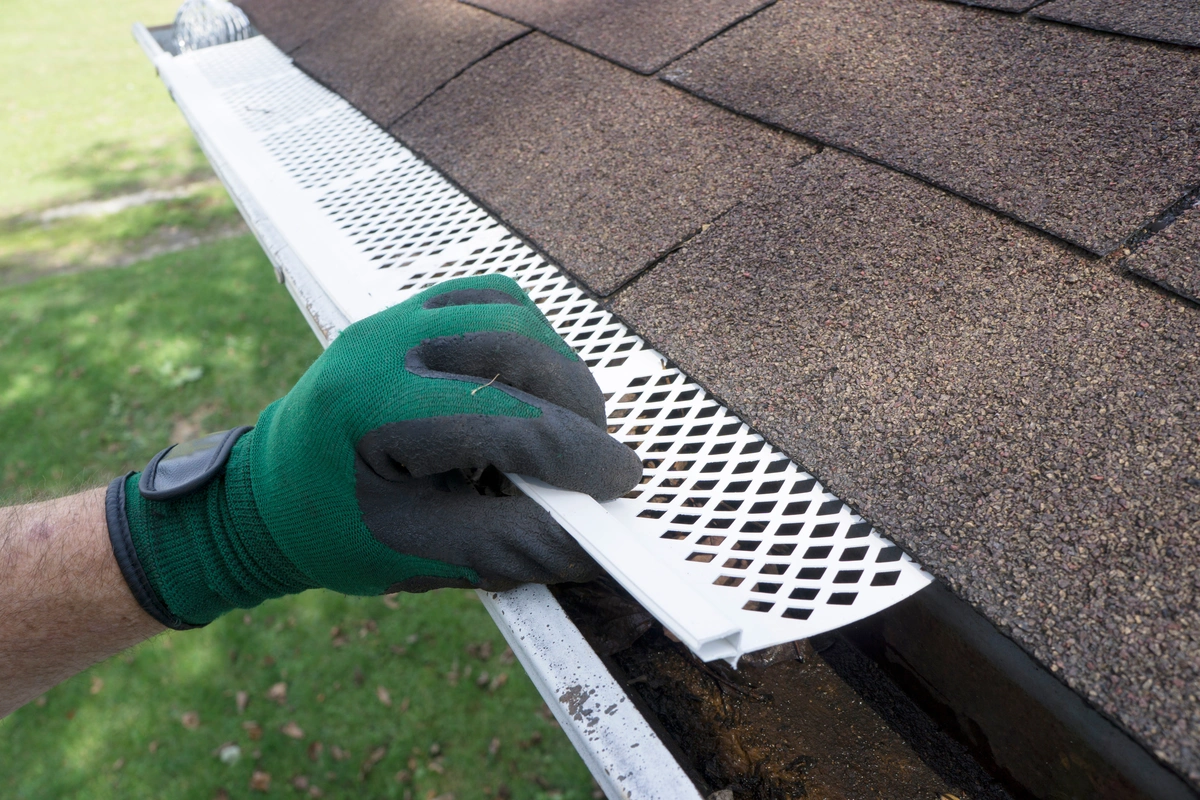
Step 4: Attach the Gutter Guards
Installing the guards properly is essential for their long-term performance.
- Position the Guards: Place the guards over the cleaned gutters, aligning them snugly with the edges. Make sure the placement allows water to flow freely while blocking debris.
- Securing the Guards: Depending on the type of guards you’ve chosen, attach them using clips, screws, or other hardware provided by the manufacturer. For brush or foam guards, simply insert them into the gutters.
- Follow Manufacturer Instructions: Always refer to the specific installation guide provided with your gutter guards. Following these precise steps is the core of how to install gutter guards effectively and safely.
Step 5: Check Slope Alignment
Incorrect slope alignment can lead to water pooling and reduce the efficiency of your gutters.
- Assess the Slope: Gutters should slope slightly downward toward the downspouts to allow water to flow efficiently. Use a level to check the alignment along the entire length of the gutter.
- Adjust if Necessary: If you notice areas where water might pool, adjust the gutter hangers or brackets to create the correct slope. This step is especially important in older gutter systems, as it finalizes the functional part of how to install gutter guards.
Step 6: Trim Excess Material
Keeping the installation neat and secure improves both functionality and appearance.
- Eliminate Overhangs: Trim any gutter guard material that extends beyond the edges of the gutter. Overhanging pieces can catch debris or become loose over time.
- Use the Right Tools: For a clean cut, use tin snips or another sharp cutting tool appropriate for the material. Take your time to ensure precision.
- Improve Curb Appeal: Neat edges not only ensure a secure fit but also enhance the overall look of your home.
Step 7: Test the Installation
Testing ensures your gutter guards are working as intended.
- Simulate Rain: Pour water into the gutters using a hose or a large bucket to mimic heavy rain conditions. Observe how the water flows through the guards and into the downspouts.
- Inspect for Issues: Check for any leaks, gaps, or misaligned sections. Make necessary adjustments to ensure a tight, secure fit.
- Final Check: Confirm that water is flowing efficiently toward the downspouts without pooling in the gutters.
Congratulations! Your DIY project on how to install gutter guards is now complete, providing your home with reliable protection against clogs and water damage for 2025 and beyond. Enjoy peace of mind knowing your gutters are ready to handle whatever the weather throws at them.
Common Signs of Gutter Damage
Even with gutter guards in place, regular professional inspections are necessary to prevent long-term issues. Keep an eye out for the following warning signs:
- Sagging or bent gutters
- Cracked or rusting gutter material
- Overflow during heavy rain
- Water stains on walls or foundation
- Pooling or flooding near the foundation
- Loose or detached sections of gutters
Spotting these problems early can save you from costly repairs down the road.
Why Trust Johnson Restoration for Your Gutter Needs
While how to install gutter guards is a task entirely possible for DIY enthusiasts, professional expertise can ensure flawless execution and maximum durability. For example, if your home utilizes a unique, high-capacity system, you need to understand the full maintenance and repair requirements. You can learn about the complex structural differences of these systems by reviewing our guide on box gutters. At Johnson Restoration, we pride ourselves on offering top-notch services designed to make your life easier and your home safer.
Why Homeowners Choose Us
- Experience You Can Trust: With years of hands-on experience, our team has perfected the art of gutter guard installation.
- Personalized Solutions: We don’t believe in one-size-fits-all. Every home is different, and we tailor our approach to meet your specific needs.
- Quality Assurance: We use only premium materials, ensuring your investment lasts for years to come.
Secure Your Home Today
Protect your home and simplify your life by letting us handle the complexities of how to install gutter guards for you. Contact us today to learn more about our services. Our team is ready to help safeguard your home and enhance its longevity.
Don’t wait for the next storm to stress out about clogs and overflow. Act now and enjoy peace of mind for years to come.